Showing posts with label Alisa's All Stars. Show all posts

Wednesday, May 20, 2020

Healthy Breakfast Cookies

How we doin everyone? I see my last post was a heavy one and here we are in heavy times again. I hope you're all hangin in there. As an introvert who can happily be by myself for long stretches of time, even I miss people.

I've lost 12 pounds (including my tits - hope y'all are having fun filling out a bikini somewhere guys!) It could be stress but honestly I'm eating more than I ever have. I think it's a combination of stress, not having to sit at my computer all day (just booked my first job in months though woohoo!) and getting to ride every day now that there's no school in addition to working out.

I wanted to share this recipe for healthy breakfast cookies as I've also been eating them every morning since this crazy stuff happened. I eat 2 of these every morning with peanut butter. That's probably an unhealthy calorie amount but since I ride at least 2 horses every am followed by a HIIT workout - mama needs!

And while these aren't hard to make they are kind of a process with some expensive ingredients so I always double the recipe and freeze half. Oh and lastly while these are healthy I do put dark chocolate chips in them which you don't have to. But hey - I like to party.

Healthy Breakfast Cookies
*adapted from Minimalist Baker
* mesquite flour has the most unique flavor and is sweet. If you don't have any (can get it on Amazon) or want to use just use more almond meal in place. 
* If your oats and oat flour are GF, then these cookies will be too.

Ingredients:
2 eggs, room temp
1 medium ripe banana, mashed
1/3 cup pulverized berries (dewberries are my fave, followed by blueberry though applesauce will work too or any mashed fruit)
1/2 cup peanut butter (can sub any nut butter)
1 teaspoon vanilla extract
2 tablespoons melted coconut oil
2 tablespoons maple syrup
1/2 teaspoon baking soda
1/2 teaspoon baking powder
Big pinch salt
3/4 teaspoon cinnamon or pumpkin pie spice
1/4 cup almond meal (flour)
1/4 cup mesquite flour
1/2 cup oat flour
1 1/2 cups rolled oats (old fashioned)
1/3 cup dark chocolate chips (can sub chopped toasted nuts, cocoa nibs or dealer's choice)

Instructions:

Preheat oven to 350.

In a large bowl, whisk the eggs then add in the mashed banana and berries or applesauce. Once smooth add in the peanut butter, vanilla, coconut oil and maple syrup. Once combined, add in the dry ingredients one at a time mixing with each addition.

Once all combined, stick the bowl in the fridge to chill and setup for 10 minutes.

Remove and use an ice cream scoop - or 2 spoons to scoop out heaping mounds onto a greased cookie sheet about 1.5 - 2 inches apart. They won't spread much so use your fingers to pat them into rounded shapes if necessary.

Bake for about 8-10 minutes until bottoms are golden and cooked through. Let cool and store at room temp for 3 days. You can refrigerate them after for another 4 days or freeze them.


Thursday, December 17, 2015

Contest Winning Chewy Chocolate Gingerbread Cookies


Happy Holidays! Merry Christmas! Buon Natale! Feliz Navidad!

I made these last week for our holiday office party cookie competition and as the title suggests - won! This is a Martha Stewart recipe worth its weight in gold. I made two adjustments to the original formula, doubling the molasses and using salted butter instead of unsalted. Doubling the molasses makes for a chewier cookie. If you prefer it less so then use half the amount listed below.

I'm not gonna lie. This recipe is a commitment. There are two chilling stages and the dough requires fresh grated ginger in addition to ground as well as hand chopped semi sweet chocolate. But if you have the time they are worth it. I worried they wouldn't be pretty enough to win so I 'glued' them into a wreath shape with melted chocolate and sprinkled them with edible glitter. The glitter made it easy to tell who had eaten a cookie that day. It was EVERYWHERE. We laughed that the gents were going to have some explaining to do when they got home as to why they were covered in 'titty glitter' ;)

Chewy Chocolate Gingerbread Cookies
Lightly adapted from Martha Stewart
*notice there are no eggs in this recipe - apparently the molasses does the job of tenderizing

Ingredients:
7 oz semi sweet chocolate bar, hand-chopped into 1/4 inch chunks (I'm not that particular about the size - I aim to make 'chocolate rubble')
1 1/2 cups AP flour, plus 1 tablespoon
1 1/4 teaspoons ground dried ginger
1 teaspoon ground cinnamon
1/4 teaspoon ground cloves
1/4 teaspoon ground nutmeg (I used fresh)
1 tablespoon unsweetened Dutch process cocoa powder
1 stick (8 tablespoons) salted butter, at room temp
1 tablespoon fresh grated (peeled) ginger
1/2 cup packed dark brown sugar
1/2 cup unsulfured molasses
1 teaspoon baking soda
1/4 cup granulated sugar or sanding sugar and/or edible glitter for rolling in

Directions:
  1. Line two baking sheets with parchment. Chop chocolate into 1/4-inch chunks; set aside. In a medium bowl, sift together flour, ground ginger, cinnamon, cloves, nutmeg, and cocoa. 
  2. In the bowl of an electric mixer, fitted with the paddle attachment, beat butter and grated ginger until whitened, about 4 minutes. Add brown sugar; beat until combined. Add molasses; beat until combined. 
  3. In a small bowl, dissolve baking soda in 1 1/2 teaspoons boiling water. Beat half of flour mixture into butter mixture. Beat in baking-soda mixture, then remaining half of flour mixture. Mix in chocolate; turn out onto a piece of plastic wrap. Pat dough out to about 1 inch thick; seal with wrap; refrigerate until firm, 2 hours or more. 
  4. Heat oven to 325 degrees. Roll dough into 1 1/2- inch balls; place 2 inches apart on baking sheets. Refrigerate 20 minutes. Roll in granulated sugar. Bake until the surfaces crack slightly, 10 to 12 minutes. Let cool 5 minutes; transfer to a wire rack to cool completely.

Tuesday, June 30, 2015

Jalapeño Cheeseburger Salad


Don't judge me. It's not like I put potato chips on it (though that would be genius.) You can add or take away whatever sound good to you. Bacon would be great or even corn or olives or avocado. And there's no need to make your own quick pickles like I did - I just happened to be out of the jarred variety.

Jalapeño Cheeseburger Salad
* Serves 3

Ingredients:
Olive oil
1 large shallot, finely chopped
3/4-1 pound ground beef
1/2 head iceberg lettuce, shredded
1 cup shredded sharp cheddar cheese, or more to taste
1 medium tomato, chopped and lightly pressed with a paper towel to remove excess moisture
1/2 cup chopped whole pickles or 'quick pickles' - 1/2 medium cucumber chopped and mixed with a couple splashes apple cider vinegar, small pinch salt and large pinch sugar - allow to sit 15 min

Dressing:
1/3 cup mayo
3 tablespoons prepared yellow mustard, or to taste
3 tablespoons chopped pickled jalapeño (from a jar or can)
pinch salt

How To:
If you don't have jarred pickles on hand, now is the time to make your quick cucumber pickle (above) and set aside.

Add a splash of olive oil to a nonstick skillet and put over medium heat. Add the shallots and season with a pinch of salt, sauté for a few minutes until they soften. Add the beef to the skillet along with another pinch salt and pepper, break up with a wooden spoon and cook until brown stirring frequently - about 12 minutes.

Next prepare your dressing by mixing together the mayo, mustard, jalapeño and salt. Set aside.

To a large bowl, add the shredded lettuce, cheese, tomato and pickles. Season lightly with salt and pepper and toss. Add the meat and shallots and toss again, then a couple tablespoons of the dressing and repeat. Taste and make any adjustments necessary per dressing, salt or pepper. More cheese never hurts.


Monday, June 1, 2015

Zoodles with Tomatoes, Goat Cheese, Walnuts and Fresh Mint


I bought a Spiralizer a few months back convinced I was going to get my shit together. You know - eater better, workout, read poetry. But we all know how the story ends. For now I'm content I finally pulled it out of the drawer, dusted it off and put it to use.

It's really kind of genius. Easy to use and as fast as an electric gadget. I made zucchini 'zoodles' this morning before work, stuck them in the fridge and pulled them back out again to use in a dinner I pulled together in less than 20 minutes.

Recipe-wise this is like a cross between a veggie soup and pasta. A little brothy-er than pasta because there's no starch to thicken the sauce plus the salt needed to season the zoodles makes them release more liquid. But it's delicious. Satisfyingly toothsome with a delicious broth you'll want to slurp. And while the mint sounds weird - don't skip it if you have it on hand. It really makes it.

Zoodles with Tomatoes, Goat Cheese, Walnuts and Fresh Mint

Ingredients:
1 tablespoon olive oil, or enough to just coat a medium dutch oven, plus more for finishing
1/2 cup chopped onion
small pinch kosher salt
3/4 pound spicy Italian sausage (ground and loose)
1/4 teaspoon garlic powder
pinch fresh grated nutmeg
1/4 teaspoon dried thyme, rubbed between your fingers
1 (14.5 oz) can diced tomatoes
Scant 1/2 can (of tomato can) dry white wine
3 oz goat cheese, or more for a 'creamier' broth
3 large, or 4 medium zuchinni, 'spiralized' on the smallest setting
1/2 teaspoon kosher salt
1/3 cup toasted walnuts
Handful of fresh mint, finely chopped

How To:
Add the tablespoon olive oil (or as much as needed to coat bottom of pan) to a medium dutch oven and bring over medium heat. Add the chopped onion and a small pinch kosher salt and sauté, stirring frequently until soft - about 4 minutes.

Add the sausage, breaking up with a wooden spoon, and cook another 10 minutes stirring often until cooked through. Season with garlic powder, nutmeg, and thyme and stir to incorporate. Stir in the tomatoes (and juice) and white wine. Bring to a boil and boil for 60 second. Reduce heat to low/medium and stir in the goat cheese. At this point add the zoodles and 1/2 teaspoon salt. Cover for 4-5 minutes to help steam, then slowly stir them into the sauce until all is incorporated.

To serve, portion into bowls (you'll need to spoon additional sauce from the pan as it will be runny) and top with toasted walnuts and chopped mint. Drizzle with a tiny bit of olive oil to finish and eat right away.


Monday, January 12, 2015

Marvelous Zuchinni Muffins. Tops like a sugar cookie, bottoms like a crumb cake.


It's amazing to me that just now, with Sawyer edging towards 17 months, I JUST now feel like I have control of my life again. And that said, now that he's in his second round of teething - that's even debatable most days.

Yet I feel kind of giddy that last Friday evening after a crazy workday, I managed to dream up this recipe and have it turn out as well as it did. It's so classic - I have no less than a couple hundred cookbooks and yet I couldn't find the trusty zuchinni bread recipe I made last. So I wrote down what I thought would work, set out the butter and eggs and went to bed, thinking I'd likely be tossing my experiment the next day. Quite the contrary - I don't think I'll make zuchinni bread or muffins from another recipe for a long time to come.

You can dress these up for winter with a hit of orange zest (or a grating of fresh ginger) or for summer with some lemon zest or just make them exactly as is. I do have to tell you, they are more of an adult muffin recipe as they have a nice mildly salty bite to them. Kris and I love a little salt in our sweets and in my opinion, the flavor balance here is perfect. But it gives them a more complex taste than most super sweet muffins - not that this bothered Sawyer Lee in the least. He LOVES them and to say he is picky is an understatement.

I hope you make them. The crust gets this amazing sugar cookie/oatmeal cookie texture while the center is dreamy and fluffy and soft. Eat them warm (micro the leftovers) with a pat of butter.

Marvelous Zuchinni Muffins
If you set out the butter and eggs the night before so you can literally whip this up in the morning in a half an hour. I was too lazy to get out my electric hand held mixer so I just whipped the butter an oil together by hand with a whisk. Totally worked but no doubt the hand held would be faster.

Ingredients:
1 stick salted butter, room temp (leave out the night before morning of baking)
1/2 cup oil (I use Spectrum Canola/Coconut blend) though vegetable or canola would work
1 1/4 cups sugar
2 cups flour
1/2 teaspoon baking soda
1 teaspoon kosher salt (if using table salt, 1/2 teaspoon)
2 eggs, room temp and beaten
1 teaspoon apple cider vinegar
1 cup grated zuchinni, pressed with a towel to remove excess moisture
1/2 cup chopped pecans
20-24 muffin liners, optional, or baking/nonstick spray

Directions:
In a large bowl, cream the softened butter and oil with a handheld mixer until smooth. Add in the sugar and cream again until well blended.

In a separate (smaller) bowl, whisk together the flour, baking soda and salt. Fold into the sugar/oil/butter mixture in three additions until combined. Stir in the eggs then vinegar, zuchinni and pecans.

Fill prepared muffin tins (either lined with muffin cups or sprayed with nonstick spray, number depending on size of your muffins tins but usually between 20-24) 3/4 the way full and bake at 375 for 15-17 minutes, just until tops are very light gold and cake tester comes out clean/with crumbs rather than wet batter when poked down the center.

Serve right away with butter or let cool completely and store in an airtight container up to 3 days.


Friday, January 9, 2015

Pork and Cauliflower Stir Fry for the Workin' Folk


Happy New Year Y'all. Mine has already started off with a bang. Work's crazy. Toddlers are crazy. Oh and all that holiday eating and drinking has left me feeling less than virtuous. Enter the stir fry. Chock full of veggies and about a million miles away from cheese-laden holiday casseroles. Not that there's anything wrong with cheese-laden casseroles, we just need to take a break from one another for a little while.

The beauty of this recipe is you can prep all the veggies and even the sauce in the morning and store them in the fridge until you're ready to make it. I bet you could even do this the night before.

Hope your new year is starting off wonderfully.

Pork and Cauliflower Stir Fry

Veg to prepare and store ahead (or use right away):
1 large shallot, sliced into thin rings
2 green onions, chopped
2 bell peppers, chopped or cut into strips (I like one red and yellow)
1 head of cauliflower, cut into small florets (to cook faster)

Sauce (mix the following together and chill in a small airtight container or use right away):
1/2 inch piece of ginger, grated
1 large garlic clove, minced
1/3 cup soy sauce (use low sodium if you are sensitive to salty food)
1/3 cup sake
1 tablespoon rice vinegar (I like brown rice)
1 teaspoon sesame oil

Also needed:
Canola/peanut or oil of choice (I like Spectrum non GMO canola/coconut blend)
1 pound lean ground pork
1 cup rice combined with 1 1/2 cups low sodium chicken stock in a medium stockpot with lid - bring to boil then reduce heat to low and let cook for 10-12 minutes, fluff with a fork and set aside
Chopped cilantro, for garnish
Red pepper flakes, optional

To make stir fry:
Add just enough oil of to lightly coat bottom and sides of a wok or large cast iron skillet, turning to help coat. Heat over medium/high heat and allow to warm through for one minute.

Add the ground pork and cook, stirring frequently for 5-7 minutes until cooked through. Kill the heat as you transfer the pork to a holding plate or bowl and set aside. Add a little more oil to the pan and turn the heat back onto medium/high.

Add the veggies (do not season with salt if using regular soy sauce) and sauté, using your spoon to disperse them over as much of the surface area as you can to help sear them. Cook and stir for about 7-10 minutes until you have a good sear on the veg and the cauliflower seems mostly cooked.

Return the cooked pork into the pan and pour over the prepared sauce. Crank the heat up all the way and stir everything to coat in the sauce and let it reduce and bubble away for a couple of minutes.

Serve over the prepped rice.

Garnish with chopped cilantro and/or red pepper flakes if desired.

Wednesday, December 24, 2014

Homemade Gingersnaps with Lemon Zest Sugar

Merry Christmas you guys! This year has been so crazy that I hope for some calm or at least more organized chaos in the new year. That said I feel so blessed I shouldn't even complain about a darned thing. My family is healthy. My baby is almost 16 months and full of piss and vinegar. Tomorrow he will wake up and be present enough to realize it's Christmas! I can't wait.

In the meantime I leave you with a new favorite cookie recipe from the cookbook, Baked Occasions. It's a gingersnap recipe and I promise you it's the easiest, most unfussy yet delicious recipe I have ever made. No mixer required and the dough will sit on the counter without getting too soft or weird should you get caught up in other holiday (or life) nonsense.

In fact, it's the PERFECT recipe if you want to make cookies (or have to) but forgot to set out the butter to soften or thought ahead for any other fiddly bits that baking often requires of you. You might even have everything on hand to make them!

Merry Merry, sweet people.

Gingersnaps with Lemon Sugar
* I used large decorating sugar versus granules - colors are even more beautiful!

Lemon Sugar Coating:
3/4 cup granulated sugar
Zest of 1 large lemon

Dough Ingredients:
1 1/4 cups granulated sugar
3/4 cup plus 1 tablespoon canola oil
1 large egg yolk
1 large egg
1/4 cup plus 1 tablespoon molasses
2 2/3 cups all purpose flour
1 tablespoon ground ginger
2 teaspoons baking soda
1 1/2 teaspoons ground cinnamon
1/2 teaspoons ground allspice (or a scant 1/2 teaspoon ground cloves)
1/2 teaspoon kosher salt

How To:
For the lemon sugar, place the sugar 3/4 and lemon zest in a shallow bowl. Stir together, being sure to break up any clumps of zest and set aside.

For the dough, preheat the oven to 325. Line several baking sheets with parchment paper and set aside. In a large bowl, whisk together the sugar and canola oil until combined. Add the egg and egg yolk and whisk to combine. Add the molasses and whisk again until fully incorporated.

In another large bowl, whisk together the flour, ginger, baking soda, cinnamon, allspice and salt. Add the dry ingredients to the wet ingredients. Use a heavy wooden spoon (and/or very clean hands) to fully combine everything well.

Use a small (1/2 inch) ice cream scoop (or a melon baller) to scoop small scoops of dough from the batter. Mix with your hands into rounded balls, roll them in the lemon sugar and set on the prepared cookie sheets, about 2 inches apart.

Bake for 12 minutes, or until just crackled on top and beautifully spread out. Let set on sheet for a few seconds before transferring to a cooling rack to cool completely. Will keep for 3-4 days in airtight container.


Friday, November 21, 2014

Corn, Sausage & Leek Chowder. A warm hug in a bowl.


If I was one of those organized people who hosted holiday open houses with Vince Guaraldi playing in every room and Mistletoe hanging above the doorway, I'd serve this soup. Comforting yet not too rich with its brothy stock laden with all kinds of textures, it has everything going for it. And that's before you add toppings!

You can use sweet sausage instead of spicy but I love a little heat against the sweet corn. And if you want it 'meatier' feel free to up the sausage to one pound. I find the ratio below makes this a perfect guys and gals soup though. The dudes feel like they're eating a hearty meal and us gals can still hold our head up and say we had soup for dinner. But if you're in the camp of 'mo sausage, mo betta' cheers to that.

Maybe one year I'll be organized enough to actually host that holiday party of my dreams. Until then I'm just happy knowing I already have the perfect recipe.

Corn, Sausage and Leek Soup
* This soup is great to make ahead and tastes amazing reheated.
* I can't stress rinsing your leeks thoroughly enough. This is best to do once you've halved them lengthwise so you can get the water in between the leaves where fine grit hides.
* Serves 6.

Ingredients:
3/4 pound spicy Italian sausage, loose
2 tablespoons salted butter
1 tablespoon olive oil
1 med sweet onion, chopped
3 leeks, white and light green (not tough) parts only, well rinsed, halved lengthwise then chopped into thin strips crosswise
3/4 teaspoon ground coriander
1/4 teaspoon salt, plus extra to taste
pinch pepper
10 oz frozen corn
32 oz low sodium chicken stock
1/2 cup half and half

Shredded cheddar cheese, for serving

Chopped Fresh cilantro, for serving
Tortilla chips, crushed up, for serving

Directions:

In a large dutch oven, break up the sausage with a wooden spoon and cook over medium heat until cooked through and some bits have become nice and brown and crispy, about 8 minutes. Remove sausage with a wooden spoon and set aside.

To the dutch oven, add 2 tablespoons salted butter and a tablespoon of olive oil. Allow the butter to melt then add the onion. Cook stirring often for 3 minutes then add the leaks. Season with coriander, salt and pepper and continue cooking and stirring over medium heat until the onion is translucent and the leeks are super soft, about 10-12 minutes.

Stir in the corn, chicken stock, and cooked sausage and raise heat slightly so the soup comes to a simmer. Simmer for a few minutes, then reduce heat to low and stir in the half and half. Taste for seasoning. If it's not the most delicious thing you've ever eaten, it needs more salt so make gradual adjustments until it is.

Serve with chopped fresh cilantro, crushed tortilla chips and shredded cheddar and or/any other toppings you see fit.

Wednesday, November 12, 2014

Slow Cooker Pork Tikka Masala with Tomato, Coconut Milk and Cilantro


This is my new favorite thing to make and eat. I usually keep a bag of chopped onion in my freezer which makes this something I can put together in five minutes in the morning before work.

The following statement may officially make me the lamest person on the planet but remembering that dinner is already made when the work day comes to a close and I get that panicked feeling (baby needs a bath! I need a bath! What are we eating? Why is my underwear on the TV?) is the best. thing. ever. As they say a baby changes everything.

Two notes: I actually like sushi rice with this (rinsed before cooking) but any variety would work. Also this freezes beautifully even with the rice included.

Slow Cooker Pork Tikka Masala with Tomato, Coconut Milk and Cilantro

Ingredients/How to:


To a slow cooker, stir together and cook for 4 hours on low:

1 to 1 1/2 pounds thin cut boneless pork chops, trimmed of fat and cut against the grant into thin 1/8 inch thick strips (you can often buy it already prepared this way or have your butcher do this)
1 large onion, diced
3 cloves garlic, minced
1-inch piece whole ginger, peeled and grated
2 tablespoons tomato paste
2 tablespoons garam masala
1 teaspoon coriander
1 teaspoon paprika or curry (I prefer curry but both are great)
2 teaspoons kosher salt
1 (28-ounce) can diced tomatoes
Big handful cilantro (no need to chop) plus extra chopped for garnish

After 4 hours, stir in the following and cook another 30 minutes while you make 2 cups of prepared rice:
1 (14 oz) can coconut milk
1 (14 oz) can garbanzo beans, rinsed and drained

After 30 minutes, turn the cooker off and stir in:
1 tablespoon honey

Serve over rice and with additional cilantro for garnish.


Tuesday, September 23, 2014

Chicken Lettuce Wraps with Rice Noodles


Every mama, daddy and/or working person should have this recipe up their sleeve. You can make it ahead and just reheat the meat in the microwave and serve in lettuce cups whenever you need dinner asap.

I add hoisin at the end for a little sweetness but you could add some sriracha for more spice or both. Of course you could leave out the noodles but I just love them in this. They add some body and depth and a toothsomeness. To put it bluntly, I'd have a hard time calling these wraps 'dinner' without them.

To make this gluten free just be sure to use gluten free soy sauce, noodles and check the other condiments involved for gluten.

Chicken Lettuce Wraps with Rice Noodles

Ingredients:
2 teaspoons grape seed or vegetable oil or olive oil
1 red bell pepper, cut into thin 1/2 inch strips
1 pound ground chicken thighs
2 large portabello mushrooms, diced
1/2 teaspoon grated fresh ginger
couple dashes garlic powder
1/3 cup green onions, chopped plus extra for garnish
1 tablespoon Mirin (sweet rice wine)
2 tablespoons soy sauce
1 tablespoon rice wine vinegar
6 oz rice noodles, boiled and drained (or rice if desired)
2 tablespoons chopped raw cashews
1 head Bibb lettuce, or whatever kind of lettuce you like to use as wraps (leaves cleaned and separated)
2 tablespoons Hoisin, optional and/or some dashes Sriracha or red pepper flakes, optional
Chopped cilantro, for garnish

How To:
Add the oil to a large nonstick pan and heat over medium heat. Add the bell pepper and sauté for 1 minute. Add the ground chicken, breaking up gently with a wooden spoon. Season with a couple of pinches salt. Cook for 2 minutes, then add in the mushrooms, ginger, garlic powder and green onions. Cook until chicken is cooked through - about 8-10 minutes.

In a separate small bowl, mix together the Mirin, soy sauce, and vinegar. Once the chicken is cooked through, add in the Mirin mixture and bring to a boil, stirring for 1 minute. Turn off the heat and remove the pan from the hot burner. Gently stir in the rice noodles and 2 tablespoons hoisin and/or sriracha if using (or red pepper flakes) then the cashews.

Serve in lettuce leaves and garnish with additional green onion and/or cilantro.

Tuesday, August 19, 2014

Miso Sea Bass, Wasabi Mashed Potatoes, and Simple Salad with Ginger Carrot Dressing


Sorry y'all. Long time no post. Work has been crazy, we're about to go on vacation and my baby is turning one in a couple of weeks so I've been spending any free time planning a little family party. Anyway Saturday we had a couple of friends over for a potluck and one of the best meals I've eaten in a long time. I volunteered to make miso sea bass and my two girlfriends filled in the gaps with Asian themed sides. And boy did they fill those gaps!

This will now be my go to meal when I'm stumped for what to serve at a dinner party. Everything when together perfectly. Sweet and sticky glazed sea bass, subtly spicy creamy mashed potatoes and a crisp salad with a refreshing carrot ginger dressing. So good!

However if I'm being honest I'm not sure I'll ever make an entire meal by myself again for company. It's kind of more fun when everyone has a hand in creating the meal…not to mention a lot less work.

Hope your summer is winding down and/or you're squeezing every last ounce of it. Personally I have never been so excited to kiss it goodbye and welcome a change in weather. Some rain would be nice too but who am I kidding? It doesn't rain in Austin anymore.

Miso Sea Bass (subbed Sea Bass for Cod) courtesy of Food & Wine

Wasabi and Green Onion Mashed Potatoes courtesy of Bon Appetit

Simple Salad with Carrot Ginger Dressing courtesy of Just One Cookbook

Sunday, July 6, 2014

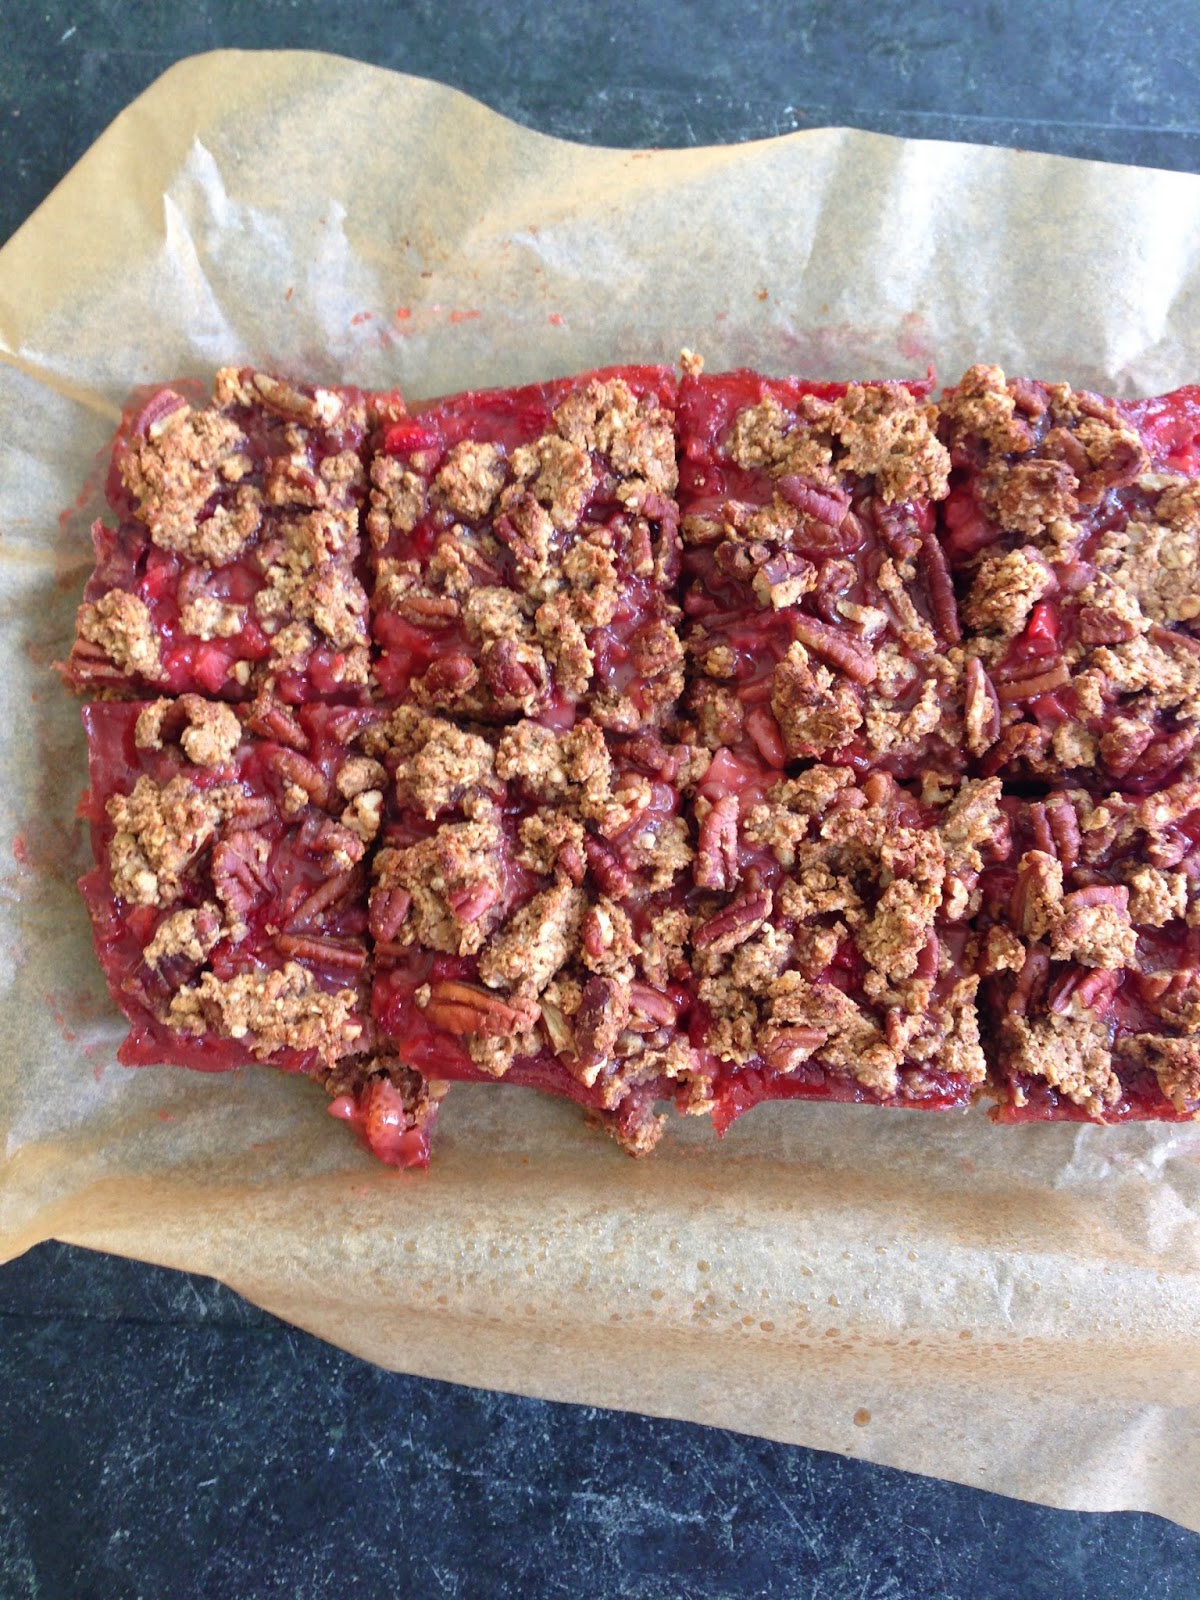
Healthy Strawberry Oatmeal Bars - Gluten Free


I discovered a new (to me) blog - Sally's Baking Addiction. Oops. This could have been a really bad thing but luckily Sally posts some healthy recipes now and then to fuel her marathon training. These bars were fantastic however I did make a few tweaks.

As with a lot of gluten free/Paleo-ish recipes, these were not sweet in the slightest. I suspect part of it was the fact my almond butter has zero sugar in it but just to be sure I could also serve these to people NOT worried about their calories I upped the sugar a hair. There was already one tablespoon in the recipe (the rest of the sweetness comes from maple syrup) so I threw caution to the wind by doubling it and also sprinkling a little over the top before baking.

They're still not what I would call a dessert bar or a 'sweet' but they're absolutely perfect for breakfast or as a snack IMO. Particularly with some Greek yogurt. And a latte. Or five.

Sally asks that you link back to her recipe rather than copy it so I'll just include my tweaks below that you can apply if you wish. I also added vanilla extract because I'm suspicious of any baked good that leaves it out. And salt for the same reason.

Enjoy!

Alisa's Tweaks to the filling:

Use 2 tablespoons sugar in the strawberry filling. If you want a more dessert like bar versus say a breakfast or 'snack' bar, I suggest 1/4 cup.

Add in the zest of one lemon to the boiled strawberry mixture along with the cornstarch mixture as well as 1 teaspoon vanilla extract and a pinch of kosher salt. I suspect orange zest would be equally amazing.

Alisa's Tweaks to the 'topping':

Add a pinch of salt into the mixture along with 1/2 teaspoon vanilla extract. I often use chopped pecans instead of sliced almonds.

Before baking, sprinkle 1 teaspoon granulated sugar evenly over the top.


Saturday, July 5, 2014

Margarita Cheesecake, My Kinda Birthday Cake


Yesterday was America's birthday and mine. I hope you all had a fantastic 4th! I had a great one. My husband flew in on a red eye from a shoot so we could spend the day together, I got to take a nap with my baby in the morning and watch him eat (inhale) scrambled eggs for the first time at our favorite place, Elizabeth Street, before we spent the day with friends and family.

This was the cake I made to celebrate my 37 years on earth. I made it gluten free by using gluten free ginger snaps in the crust and no one was the wiser. But feel free to use regular ginger snaps or graham crackers. The filling is a classic key lime cheesecake filling but since it was my birthday I had to step it up a notch.

Enter the topping: a tequila infused whipped sour cream situation. You two should get to know one another.

Margarita Cheesecake with Tequila Whipped Sour Cream
Makes one big ass cheesecake.
*Takes a few prep bowls and steps, but worth it. Like all cheesecakes this MUST be made 1-2 days ahead and kept chilled in fridge for it to achieve the right consistency.

Crust:
2 cups crushed ginger snap cookies (I used one 8 oz box Mi-Del Gluten Free Ginger Snaps), vanilla wafers or graham crackers
4 tablespoons salted butter
pinch kosher salt
zest of a small lime

Cheesecake Filling:
3 (8 oz) packages cream cheese, room temp
1 1/4 cups sugar
4 large eggs, separated
1 cup (8 oz) sour cream (I used light)
1/2 cup freshly squeezed lime juice
1 teaspoon lime zest
1 teaspoon vanilla extract
pinch kosher salt

Topping:
1 pint heavy cream, very cold
heaping 1/4 cup powdered sugar
1/2 teaspoon vanilla extract
1 tablespoon tequila
pinch kosher salt
zest of 1 lime
1/3 cup sour cream (I used light)
slices of lime, for garnish (optional)
whole strawberries, for garnish (optional)

Directions:
Preheat oven to 350 (I used convection bake setting.) Lightly butter a 9 inch round springform cheesecake pan, coating all sides and bottom. Use a large piece of aluminum foil to 'wrap' the base of the pan (just to prevent leaks) tucking it up and around the sides. Set aside.

In a medium bowl, combine cookie crumbs, melted butter, salt and lime zest until well blended. Press the crumb mixture into the bottom of the buttered pan and just slightly up the sides. Use a lighter hand when doing this or it will be brick-like after being baked.

Bake for 8-12 minutes until edges are golden. Set aside to cool on a wire rack.

Meanwhile in a standing mixer or big bowl with hand held mixer, beat the cream cheese on medium speed until fluffy. Gradually add in the sugar, mixing until very well blended and being sure to scrape along bottom/sides for any hiding clumps.

Add egg yolks, one at a time blending after each addition just until yellow disappears. Add in the sour cream, juice, zest, vanilla extract and pinch salt. Mix well, scraping down sides and bottom once again.

In a separate (clean and dry) large bowl, whip the egg whites on high until stiff peaks form at the end of a beater when the beater is turned off but mixture is not dry (meaning there's still a little shine to them but they are no longer liquid.)

Gently fold the egg whites into the cream cheese mixture, until just mixed. Pour into the prepared crust and bake for one hour. Gently slide the tray the cake is on out and watch how the cake moves. If the entire thing is still jiggly/watery, bake another 10-15 minutes until JUST the very center is quivery. The center being loose is the goal - not the entire cake.

When just your center is jiggly, shut the oven door and shut the oven completely off. Leave for 15 minutes. Then crack the door and leave another 20 minutes.

Remove from the oven and allow to cool completely. It's a big cake and will take a while so be patient.

Cover and chill over night or at least 8 hours.

Meanwhile, make your topping (topping can also be made several hours ahead or even overnight and put on the cake before serving.)

Using a standing mixer or large bowl with hand held mixer, beat the cream on high until it forms soft peaks, gently add in the confectioners sugar and continue to whip until you achieve classic whipped cream texture. Add in your extract, tequila, salt and zest and beat again just until incorporated. Make sure no little clumps of lime zest are lurking. Finally fold in the sour cream.

Store in an airtight container in the fridge until ready to use.

To assemble, remove the cake from pan. Spread the whipped topping evenly over and decorate with lime slices, strawberries and more lime zest or strips of lime zest if desired.


Friday, May 30, 2014

Mocha Heath Bar Bundt Cake (Can't Stop Won't Stop Cake)


Got to co-host the cutest sweetest baby shower last weekend for my new friend Jess who is due very soon with her first baby. My co-hostess with the mostess Krystle organized a fun project for us all to do painting onesies for Baby Gaffney which was really cute. Gurls got all crafty up in here! My backyard looked like a Pinterest board. Didn't think I was the crafting type but give me some wine and apparently I'll do anything. Except run.

Krystle also made an insanely delicious savory tomato cobbler which I'll post next as well as lots of other goodies. I also had grand plans to make a lot of food but with Kris out of town and the baby now crawling, I was just lucky to pull off this cake.

And I'm so glad I did because it just may be one of my favorite things I've ever made. After harassing Jess' hubby for details on what kind of treats she likes, we got the lowdown that she's a Heath Bar/mocha/toffee ice cream kinda gal. So Krystle made Heath bar coffee ice cream (to die for) and I made this chocolate mocha bundt cake that got drowned in a mixture of condensed milk and coffee after baking THEN caramel sauce and toffee bits. Mmm hmm. You heard me.

Next time I make it I'm going to soak it in the suggested Kahlua mixture and see what kind of party that leads to. I suspect a fun one.

Lastly I can't take credit for its new official title - Can't Stop Won't Stop Cake. That was all the mama-to-be.

Mocha Heath Bar Bundt Cake (Can't Stop Won't Stop Cake)
From Allrecipes, submitted by alijmorris
* For a nonalcoholic version, replace the kahlua with 3/4 cup chocolate syrup mixed with 1/4 cup warm water.
* When I made this the first time, I used the chocolate syrup/water mixture for the Kahlua substitution in the cake but mixed a can of condensed milk with some hot coffee to pour over the cake instead of mixing the other half with confectioners sugar which worked well. But I suspect the more Kahlua, the better.
* This cake gets better the more it sits soaking up the glaze. Make it at least the day before you want to serve it but do not apply the caramel sauce/Heath Bar bits until closer to serving or it will drink it up and not look as pretty.

Ingredients:
3/4 cup salted butter, room temp (1 1/2 sticks), plus extra for buttering pan
2 cups white sugar
3/4 cup unsweetened cocoa powder, plus extra for dusting pan
4 eggs, separated and at room temp
1 teaspoon baking soda
2 tablespoons water
1/2 cup strong brewed coffee (can use decaf)
1 cup coffee flavored liquor (kahlua), divided (if subbing see above note and divide prepared mixture)
2 tablespoons vanilla extract
1 1/3 cups all purpose flour
tiny pinch salt

Glaze:
1 cup confectioners sugar mixed well with 1/2 cup Kahlua OR 1/2 can condensed milk mixed with 2 tablespoons hot coffee

Topping:
1/2 jar store bought caramel sauce (like for ice cream)
1 cup Heath Bar bits/toffee bits

Directions:
Preheat oven to 325.

Butter the inside of a 10 inch bundt pan then 'flour' liberally with cocoa powder. Tap out excess and set aside.

In a large measuring cup, dissolve baking soda in water, stirring well. Add in coffee, 1/2 cup of the coffee liquor (OR chocolate syrup mixture if subbing) and vanilla.

In a large bowl or standing mixer, cream together the butter and sugar until fluffy (will be a little stiffer than other butter/sugar combos but be sure to scrape bottom to get any sugar sticking to the bottom.) Beat in the cocoa, then egg yolks one at a time. Alternately beat in the flour and coffee mixture just until incorporated along with a pinch salt.

In a large glass or metal mixing bowl, beat the egg whites until stiff peaks form. Fold 1/3 of the whites into the batter, then quickly but carefully fold in remaining whites until no streaks remain.

Pour batter into pan. Bake for 55-6- minutes until a tester inserted in center comes out clean.

Meanwhile prepare glaze (either 1/2 cup Kahlua with 1 cup confectioner sugar OR 1/2 can condensed milk with 2 tablespoons hot coffee.)

Let cake cool for 10 minutes in the pan then turn out onto a wire rack lined with wax paper (so you can move it later.) Pierce warm cake all over carefully with tester or fork and drizzle the glaze over until it soaks it all up (careful - makes a mess!)

Let cake cool all the way and either wrap well in plastic wrap or transfer to a cake keeper until ready to serve. An hour before serving, drizzle liberally with warmed caramel sauce (microwave for a few seconds so it pours easily) and sprinkle Heath bar bits over the top.


Wednesday, May 7, 2014

Deep Dark Chocolate Mousse Pie with Chocolate Cookie Crust


Well when falls off the Paleo wagon, one really falls off. I have to admit being able to eat dairy again is the best thing ever. I had big plans for a French Silk pie yesterday but a non-napping baby forced me to try go with plan B that didn't involve so many mixing bowls and steps. As it turns out it was a delicious plan B.

The original recipe (from my beloved dog-eared Mrs. Fields Cookie Book) called for cream cheese. Since I didn't have any on hand I subbed creme fraiche and crossed my fingers. I think it gave it a particularly amazing texture. Definitely more 'mousse' like than it would have been with cream cheese and I loved the subtle depth of tanginess the creme fraiche lent to the filling really playing up the dark chocolate flavor. Another bonus to using creme fraiche? You can make this pie on the spur of the moment without having to wait for any of the ingredients to come to room temp first.

By the way my husband and our good buddy staying with us topped this pie with…are you ready?…Blue Bell and a big splash of bourbon. They swear it's the best thing ever.

Deep Dark Chocolate Mousse Pie
* Adapted from Mrs. Fields Cookie Book

Crust:
1 1/2 cups chocolate wafer crumbs (ground fine)
5 tablespoons salted butter, melted
2 tablespoons granulated sugat

Filling:
6 oz dark chocolate (55%-75%), chopped
1/2 cup heavy cream plus 1/4 cup, plus additional for whipping if desired
8 oz creme fraiche
1/4 cup packed light or dark brown sugar
1 tablespoon vanilla extract
pinch salt
3/4 cup semi sweet chocolate chips

Directions:
Preheat oven to 350.

In a medium bowl, combine the crust ingredients until well mixed. Gently press the mixture into the bottom and up the sides of a 9-inch pie plate. Bake for 10 minutes then place on a wire rack to cool.

For the filling, place chopped chocolate in a small bowl. In a small saucepan, bring 1/2 cup of heavy cream to just a simmer. Pour the hot cream over the chocolate. Let stand, covered, for 5 minutes, then stir until smooth.

In a medium bowl with an eclectic mixer, beat the creme fraiche, sugar, vanilla and pinch salt until smooth. Beat in the remaining 1/4 cup heavy cream. Gently beat in the melted chocolate mixture. Set aside.

Sprinkle the 3/4 cup chocolate chips evenly over the bottom of the crust (if it's still a little warm that's fine - the chips will melt a little which is just groovy.)

Pour the filling over, and if the crust was still warm, let cool a bit before covering with plastic wrap and refrigerating for at least 2 hours before serving to firm up a bit.

Pie will keep, covered, for up to 4 days in the refrigerator.

Tuesday, April 29, 2014

Creme Fraiche Dijon Baked Chicken


You can whip this together in five minutes. I don't even use a separate mixing bowl but mix everything right in the serving pan first before adding the chicken. It makes its own sauce as it bakes that you can ladle over rice or veggies to serve with it. Sour cream would probably work if you couldn't find or didn't have creme fraiche but try to use the real deal if you can since there's so few ingredients. The only way to mess this up is to over cook the chicken so remove it as soon as the sauce is bubbling all around it just when it's cooked through.

There are few 'five minute' recipes I'd serve to company but this is at the top of my list.

Creme Fraiche Dijon Baked Chicken
*recipe can easily be doubled, just adjust cooking time accordingly

Ingredients:
2-3 boneless skinless chicken breasts
1/2 cup creme fraiche
zest of a small lemon
2 teaspoons whole grain dijon mustard
1/4 cup chicken stock
2 tablespoons shredded parmesan
1 small shallot (size of a fig), diced
pinch fresh ground nutmeg, red pepper flakes, kosher salt and pepper (preferably ground tricolor pepper if you have it)

Directions:
Preheat oven to 350.

In an 8x8 baking dish, mix together the creme fraiche, lemon zest, mustard, stock, parmesan, shallot, nutmeg and peppers and salt.

Add the chicken. Sprinkle the tops lightly with salt then turn over in the creme fraiche mixture to coat. Push around the dish so that they're evenly spread apart then put in the oven and bake for 25-30 minutes (this depends on the size of your chicken - mine was organic and on the small side) or JUST until cooked through. The sauce should just be beginning to bubble around and in between the chicken. Let rest for 5 minutes before serving.

Friday, April 25, 2014

Manchego and Sausage Stuffed Mushrooms (Magic Mushrooms)


My new favorite way to get cheese into my mouth. These are gluten free and can be prepared ahead and refrigerated for several hours or even overnight for an easy make ahead appetizer. Happy Weekend Y'all!

Manchego and Sausage Stuffed Mushrooms (Magic Mushrooms)

Ingredients:
3 (8 oz packages) Baby Bella mushrooms
½ pound sweet Italian sausage
Salt and pepper
1 tablespoon of olive oil, plus more for oiling baking dish
½ cup chopped shallots
2  cloves garlic, minced
2 tablespoons sherry vinegar (this adds a particularly wonderful flavor but white wine or maybe even cider vinegar would work)
1/4 tspn paprika
Zest of small lemon
2 tablespoons almond flour (seasoned or plain dried breadcrumbs would work also if not gluten free)
¾ cup shredded Manchego cheese, lightly packed
½ cup crème fraiche (sour cream would work too or even Greek yogurt)
Pinch red pepper flakes
1 ½ tablespoons finely minced green onions
Big pinch fresh ground nutmeg
Parsley, additional chopped green onion or cilantro for garnish (optional)

Directions:
Preheat oven to 400 if making right away.

Clean the mushrooms by rinsing quickly under cold water and patting dry (if you're a purist feel free to hand wipe each one instead - see you in a month.) Carefully remove the stems by pulling firmly and gently from the base where they connect. If the stems are particularly stubborn, you may need to use a small spoon to scrape out the leftover stalk to make room for the filling.

Next chop up enough of the stems (fine dice) to equal half a cup and set aside (you can discard the rest of the stems or save for another use.)

Lightly oil a large casserole dish with olive oil then place the mushroom caps spacing them evenly apart inside, cavity side up. Season very lightly with salt. Set aside.

Next heat a large skillet over medium heat. Add the sausage and cook, breaking up well with a spoon (you don't want super big chunks because you're going to stuff it into fairly small mushrooms.) Once broken up add the half cup of diced stems along with a pinch of salt and pepper and cook until the sausage is cooked through, about 8 minutes.

Remove using a slotted spoon to a holding plate and set aside. Meanwhile add a little olive oil to the pan if necessary and let heat through for 30 seconds. Add the shallots with another small pinch of salt and cook for 4-5 minutes until beginning to turn translucent. Add the minced garlic and cook another 2 minutes or until softened.

Raise the heat slightly and add in the sherry vinegar. You want it to bubble a little and reduce until there's just a scant amount of liquid left in the pan. At this point kill the heat and move the skillet off the hot burner.

Carefully stir back in the sausage/mushroom mixture along with 1/4 teaspoon paprika, lemon zest, almond flour, creme fraiche, red pepper flakes, green onions and nutmeg until well mixed. Taste for seasoning and add pinch more salt/pepper if desired.

Use a small spoon to stuff the prepared mushrooms (I have found that if I pile them high enough I can use up all the filling.) At this point you can let them cool, cover and refrigerate for a few hours or even overnight before baking or bake right away in a 400 degree oven for 20-25 minutes until the top of the filling just begins to brown and they mushrooms have released their liquid and cooked through.

Cool for 5-10 minutes before garnishing with chopped herb of choice and serving.


Monday, April 21, 2014

Simply Perfect Carrot Cake with Maple Cream Cheese Frosting. No one has to know it's Paleo.


So here's my thing with Paleo desserts so far. They're actually pretty good. You don't miss the refined sugar because real maple syrup and/or honey do a fine job providing the sweet. You don't miss the fat because you don't have to worry about using low fat nonsense. But the texture can be tricky. The initial product is often great but gets soggy after a few hours because almond flour is so rich and dense.

This carrot cake changed my tune. It's honestly authentically carrot cake like. Moist and rich, yes. Soggy no. Even my husband had no freaking clue I'd sabotaged a perfectly good Easter tradition with something sans refined sugar, flour or weird preservatives. And he's a PICKY dessert eater. Like crazy picky.

Anyway I know I just shared the oh so exciting news that my baby is over his dairy issues and therefore I could have gone ahead with a traditional full fledged carrot cake recipe with loads of butter, flour and sugar but honestly I think I'll have a hard time doing that sort of recipe unless it's a holiday from now on. Okay fine - Easter is most definitely a holiday - if not the mother of them actually but I mean a more fun holiday. Like Halloween or Christmas which is just a lovely excuse to eat badly (awesomely) for a month. You know what I mean.

Anyway if you're curious about Paleo or just want to try something a little different with your baking experiments I heartily recommend this recipe. Obviously not calorie free but undoubtedly better for your than the old school version.

Simply Perfect Carrot Cake
*slightly altered from the recipe by She Cooks He Cleans

Ingredients:
small amount of butter or coconut oil for buttering pans
small amount of coconut flour for dusting pans
1/2 cup walnut or grape seed oil
1/2 cup honey
3/4 cup coconut palm sugar
5 eggs, room temp
1 1/2 teaspoons vanilla extract
3 cups blanched almond flour (I use WellBee)
1 1/2 teaspoons baking soda
1 1/2 teaspoons kosher salt
1 1/2 teaspoons ground cinnamon
1/2 teaspoon nutmeg (I use fresh ground)
3/4 cup shredded unsweetened coconut (I use Let's Do Organic)
3 cups shredded carrots (preferably organic)
3/4 cups raisins (preferably golden) or chopped dates or even dried pineapple
3/4 cup chopped toasted walnuts or pecans or even slivered almonds
Zest of a medium orange, optional

Directions:
Preheat oven to 325F (I used convection bake.)  Line two 9-inch-diameter cake pans with parchment paper and butter bottom and sides with either butter or coconut oil. Lightly dust with coconut flour and tap out excess in the sink.
Using electric mixer,  beat oil, palm sugar, and honey until well mixed.  Add eggs one at a time, beating well between eggs. Mix in vanilla extract.
In a separate bowl, mix together almond flour, baking soda, salt, cinnamon, nutmeg, and shredded coconut.  With mixer on low speed, slowly add the flour mixture to the wet ingredients.  When it has all been added, beat until well blended.  Stir in carrots, raisins, toasted walnuts and orange zest if using.
Divide batter between cake pans.  Bake at 325 for 35 minutes, or until toothpick inserted into center of cake comes out clean.  Cool cakes in pans for 15 minutes.  Run a small knife around the edge of the pans to loosen the cakes, then invert carefully on a cooling rack; cool completely.

Maple Cream Cheese Icing (*some additions NOT Paleo, but optional - I also use more sweetener than original recipe called for as I found it not sweet enough but feel free to start with 1/4 cup maple syrup and adjust accordingly)

2 (8 oz) packages organic cream cheese, room temp
1 stick salted organic butter, room temp
*1 tablespoon orange liquor
1 teaspoon vanilla extract
small pinch kosher salt or sea salt
1/2 cup maple syrup
2 tablespoons honey or 2 tablespoons coconut palm sugar, or to taste, OPTIONAL

3/4-1 cup shredded coconut (unsweetened) for decorating, optional OR chopped toasted nuts

Cream together cream cheese and butter in an electric mixer.  Add liquor if using, vanilla extract and pinch salt and mix well. Gradually add maple syrup and beat until well-combined and fluffy. Taste for sweetness then mix in additional honey or palm sugar if desired (palm sugar will dissolve into icing if mixed long enough.)
Place 1 cake layer, flat side up, on cake platter.  Spread approximately 1 cup of frosting over the layer.  Top with the second cake layer, flat side down.  Spread remaining frosting over the top and sides of cake.  Top with coconut or chopped nuts (optional). Refrigerate, if possible (I don't.) Serve at room temperature.

Friday, April 18, 2014

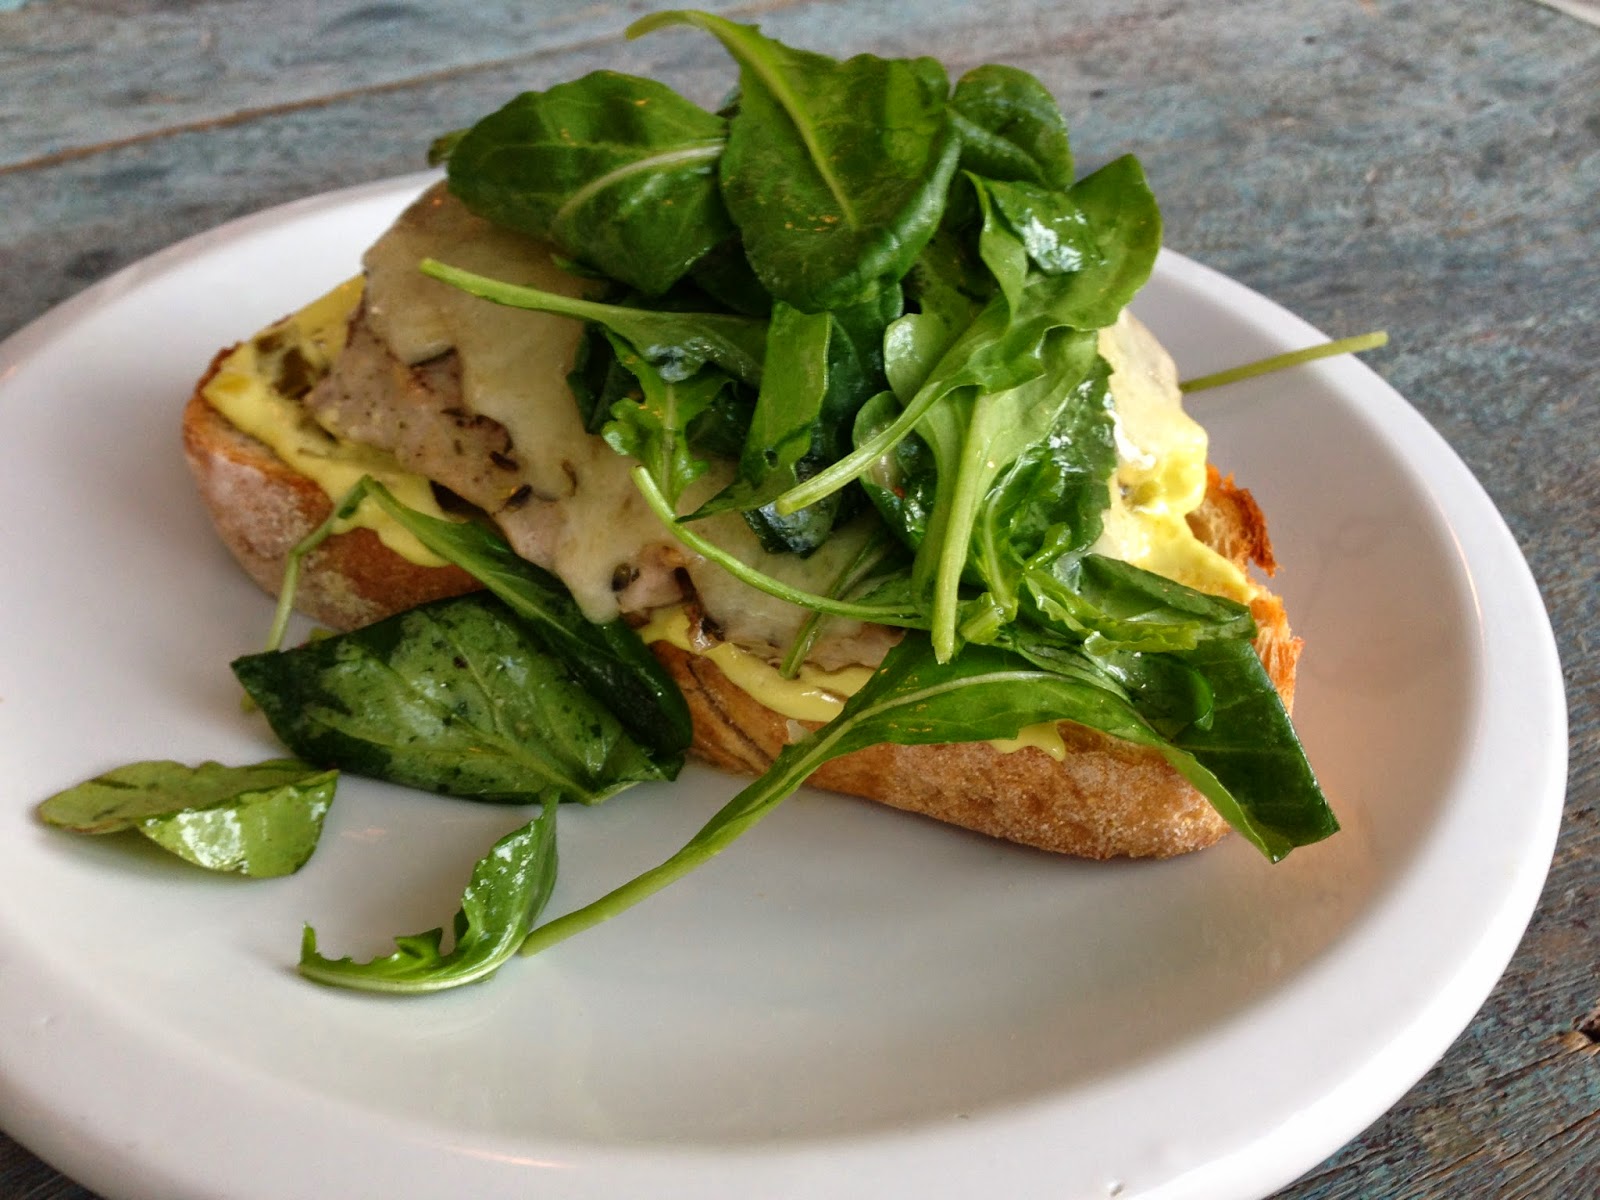
Giada's Fancy (But Simple) Tuna Melt with Grafton Cheddar and Sweet Pickle Aioli

Guess who's over his dairy allergy? My baby boy! Since last Friday I've eaten pizza, grilled cheese, salad with goat cheese and this insanely good tuna melt.

This is Giada's recipe. The only thing I did differently was to make my mayo from scratch (don't roll your eyes - it takes five seconds with an immersion blender) as I can no longer ignore the fact that GMO soy is in everything store bought and I'm not going to eat that crap anymore whenever possible.

Anyway this is already a new favorite in the rotation at our house. I would try swapping capers for the sweet pickles if the mood strikes you or even a basil aioli. The possibilities are endless.

What really makes this though is the salad you serve over the top. It's crisp and cool and the dressing has a hint of a refreshing bite to it from the shallot (thank you Ina Garten.) Crisp thick toasted sourdough, melting hot tuna topped with oozing white cheddar and a cool refreshing salad on top…it'll make everything right with the world.

Open Faced Tuna Melts with Cheddar, Sweet Pickle Mayo and Arugula Salad
* by Giada DeLaurentiis, salad dressing by Ina Garten
* serves 2

Ingredients:
1/4 cup store bought or homemade mayo
2 tablespoons chopped sweet pickles (or store bought pickle relish - OR you could try capers or even chopped fresh herbs)
2 fresh Ahi tuna steaks
kosher salt and black pepper for seasoning
2 teaspoons herbs de provence
olive oil, for seasoning bread and searing tuna steaks
2 thick slices sharp Grafton white cheddar, or other aged cheddar
2 thick slices sourdough bread
2 cups arugula
handful of cherry tomatoes, optional
*Couple tablespoons vinaigrette (or to taste), recipe below

Directions:
Mix mayo and chopped pickles together and set aside.

Preheat oven to 400 degrees. Place bread slices on a cookie sheet and drizzle lightly with olive oil then put in the oven for 10 minutes just until toasted. 

Meanwhile, season tuna steaks with salt, pepper and herbs de provence. Add enough olive oil to a cast iron skillet or heavy bottom pan and heat over high heat. Once hot, add the tuna and sear 3 minutes. Flip to the other side and place the cheese slices over the tops and cook another 2-3 minutes for medium rare or until desired doneness.

Toss the arugula and tomatoes with a couple of tablespoons of the dressing and a small pinch of salt and pepper. 

To assemble, place a slice of toast on the center of each plate. Divide the mayo spread over the slices and spread evenly across. Then add the tuna melts and divide the arugula salad over the tops. Serve right away.

Ina Garten's Creamy Shallot Vinaigrette:
1/2 cup olive oil
1 tablespoon red wine vinegar
1/2 teaspoon dijon mustard
1/4 teaspoon honey
1 teaspoon kosher salt
freshly ground black pepper
1 tablespoon minced shallot


Monday, April 7, 2014

Juicy Blackberry Pecan Muffins. Hello Spring, nice to see you.


So gluten free, dairy free, soy free baking is a little tricky. Coconut oil works wonders as a butter substitute but often times imparts its signature flavor. Coconut milk is also a miraculous substitute for milk or heavy cream but same issue. And if you're religiously doing Paleo, almond flour technically works but so far everything I've made has a spongy/wet quality after cooling which isn't so great for things like quick breads or muffins.

So this time I tried modifying a Martha Stewart recipe with Bob's Red Mill Gluten Free All Purpose Baking Flour and hooray! Muffins that act and eat like muffins and don't get soggy or weird when left out over night!

Like I said with my baby's allergies I got all hippie on you and made these gluten free and dairy free and with coconut sugar. But don't worry. My husband who is literally the pickiest eater when it comes to baked goods on the planet didn't notice the difference. In fact I have a hunch the coconut milk might have made them even richer but if you don't have the need to avoid dairy or gluten feel free to use regular 'ol butter and flour and sugar and cow's milk. I'm sure they'd be mighty fine.

Juicy Blackberry Pecan Muffins 
*Adapted from Martha Stewart
*Modifications for gluten free/dairy free below
*Coconut palm sugar imparts a dark golden color onto these muffins so don't be shocked if yours are lighter if using regular granulated sugar

Ingredients:
*2 cups AP flour or Bob's Red Mill Gluten Free All Purpose Baking Flour
1 1/2 teaspoons baking powder
1/2 teaspoon kosher salt
1/2 teaspoon cinnamon
2 cups fresh blackberries
*1/2 cup (1 stick) butter or Earth Balance Soy Free, Dairy Free Buttery Spread, at room temp
1 cup sugar (or coconut palm sugar)
2 eggs, room temp
zest of a small lemon
2 teaspoons vanilla extract
*1/2 cup whole milk or coconut milk at room temp
1/2 to 3/4 cup chopped pecans or walnuts

Directions:
Preheat oven to 375. Line a 12 standard muffin cup pan with paper liners or alternatively spray with either nonstick spray or brush lightly with melted coconut oil (if you need to avoid soy found in many sprays.) If not using liners, lightly sprinkle the greased cups with a little flour then tap out excess.

In a medium bowl, whisk together the flour, baking powder, salt, and cinnamon. Take a heaping tablespoon of this mixture and sprinkle it over the blackberries in another medium bowl. Give a gentle toss to lightly coat all the berries and set aside.

Meanwhile, in a standing food mixer or large bowl with hand held mixer, blend the butter and sugar for 3 minutes until fully mixed, pausing midway to scrape the bottom and the sides.

Add the eggs in one at a time, blending well each time. Add in the zest and vanilla extract and mix until incorporated. Add the milk and blend just until incorporated.

Carefully add in the flour mixture in two additions, blending just until incorporated each time. Use a spatula to fold in the blueberries and nuts.

Use an ice cream scoop to divide the batter into your 12 cups. The cups will be full but don't worry - these muffins rise very well and don't spill over (though a baking sheet underneath is always good insurance.)

Bake for 25-30 minutes until golden on top and a toothpick inserted comes out clean.

Enjoy warm or store in an airtight container for 2 days.