Friday, February 26, 2010
Charlotte's Chili
I am blessed with having so many wonderful cooks in my life. My own mom (I think I remember eating fast food about 3 times growing up - honestly) as well as my mother in law. Two incredible ladies. Two incredible cooks. (Oh and my sister too - she's a caterer - see what I mean?)
Well I could talk for hours about any one of them but tonight is Charlotte's - my mother in law's turn. Charlotte LOVES experimenting and tweaking and pushing a recipe to its limits. People are always asking her why when she makes something, it tastes so much better than when they do! Well, I can't give you her secrets, though I can tell you, it never hurt a pound cake to add another egg to it. Oops I've already said too much... The point is - recipes were meant for fiddling once you've mastered your landing gear in the kitchen.
Anyway, not long after we met she made me the most wonderful book of her favorite recipes put together in a neat, tidy binder. Many of them are still my all time favorites - but the front runner has to be Charlotte's chili. One of the first times my husband and I went to visit her she'd just cooked up a pot and I almost fell out of my chair when he put ketchup and mustard on his!
'What the hell's wrong with this chili that you have to put hot dog condiments on it?' I secretly and silently wondered.
Well it turns out not a damn thing. The chili is perfect (the additions were a personal quirk of his.) Hearty and comforting yet clean and refreshing at the same time. The thing about it is, it equals more than the sum of its parts. Nigella's chili for example, which I'm a huge fan of, has an ingredient list that reads like a college thesis compared to this. And in a pinch, I'd have to pick Charlotte's. While Nigella's fits a certain hunker down for winter mood, Charlotte's works on a snow day like today (really, NY? Really?) as well as it does on an August night just after the crickets come out.
I've never told Charlotte this but her chili was the first thing I made when we moved to New York. We were in corporate housing - an apartment in Hell's Kitchen with a spectacular view of the Hudson - with buildings peering in all around us like nosy neighbors, and I was so excited and stimulated by being here that I had to make something just to anchor me down.
So I made Charlotte's chili. And as we ate it watching the cats tool around the new apartment like private detectives, I knew that everything would be alright. And it was.
One final note - something unique that I almost didn't remember about this chili is the fact that you don't drain the red kidney beans. I'd gotten so used to chefs yammering in my ear about how important it is to drain and rinse canned beans, I almost went against Charlotte's instructions. Don't. This is one case at least where they're wrong. (On a similar subject - in The Pioneer Woman Cooks, Ree Drummond rails against the hatred of seasoned salt, such as Lawry's and says she's all for it. Go Ree! Have you gotten her book yet? It's fantastic.)
Charlotte's Chili
* This is easy to put together but it does need an hour to simmer.
* Serves 4, but chances are you'll want extra to freeze so you might double this.
* I made the mistake of eating this with a little yellow mustard over it last time to see what the heck is wrong with my husband and it is indeed delightful. Funnily enough, he seems to have given up the habit.
Ingredients:
2 tablespoons vegetable oil
1 small to medium onion (preferably Vidalia or Spanish) chopped
pinch salt and pepper to season
1 garlic clove, minced
1 bell pepper, chopped (I like yellow or red, Charlotte likes green)
1 pound lean ground beef
1 (28 oz) can whole peeled tomatoes, such as San Marzano
3/4 teaspoon kosher or sea salt
2 oz (1/4 of an 8 oz can) tomato sauce
1 (15 1/2 oz) can red kidney beans, UNDRAINED
pinch cayenne pepper or chili powder
small pinch fresh cracked pepper
Grated sharp cheddar cheese, for serving
Instructions:
Put a large lidded dutch oven over medium heat. Add the oil and let heat through for 30 seconds before putting in your onions. Season the onions with a little salt and pepper and saute, stirring occasionally, for about 8 minutes until softened. Stir in the garlic and bell pepper and cook another 2 minutes, then add the beef breaking it up lightly with a wooden spoon and cook until just browned, stirring occasionally - about 10 minutes.
Add in the can of tomatoes (juice and all), salt, tomato sauce, beans, and seasonings, stirring well. Reduce the heat to medium low, place the lid 3/4 the way over, and simmer for one hour, stirring every 15 minutes or so to make sure the bottom's not burning (I actually have to keep my burner on low the whole hour to prevent this.)
Taste for salt, making any adjustments necessary and serve with shredded cheddar, and or mustard or ketchup over the top.
Labels:
all in one meal,
beef,
chili
Thursday, February 25, 2010
Good Morning, Muffin.
I love the idea of getting up on the weekend and whipping together a fancy breakfast. But as you can see from the number of breakfast recipes on this blog, morning and I don't get along that well. I can't hold a conversation before I've had my coffee, much less measure out flour.
This recipe is a blessed exception, in no small part to Bisquick which cuts out a lot of the measuring I was just referring to. Also a blessing is the fact that the cream cheese can come straight from the fridge, erasing any forethought on my part as to letting it soften ahead of time. This way it doesn't melt into the batter but stays in little chunks throughout, adding to the delight of the muffin. You'll notice I omit the addition of salt because Bisquick has it in there, but if you're a devout believer in its flavor enhancing ability you can add in a tiny pinch to the batter. (I do, but then again I'm not on the cover of Health magazine, either.)
And of course, you can fitz and futz with this recipe until the cows come home with creative additions and variations (some of which are at the bottom of this post) but what I was going for here was a good, quick muffin whose prep bowl and utensils I could wash up long before they even come out of the oven. That way, my inner ice queen stays dormant, and I can actually tell my dear husband when I hand him a hot muffin, 'Good Morning.' And mean it.
Strawberry, Granola and Cream Cheese Muffins
Ingredients:
2 cups Bisquick
1/3 cup sugar plus 1 tablespoon
2/3 cup granola - your favorite brand (I like vanilla and dried cherry)
1/2 teaspoon cinnamon
1/8 teaspoon nutmeg
1 egg, lightly beaten
2/3 cup milk (not skim)
2 tablespoons vegetable oil
1 teaspoon vanilla
1 cup fresh or frozen strawberries, chopped
2 oz cream cheese, broken into little bits with your fingers (if you really want that creamy tang in every bite - double this)
Instructions:
Preheat your oven to 350 if it's convection, 375 if it's not convection. Grease a 12 cup muffin pan well with nonstick spray, set onto a good quality baking sheet, and set aside.
Meanwhile, place the Bisquick, sugar, granola, cinnamon, and nutmeg into a large mixing bowl and stir well with a spoon. Make a well in the center, then pour in the egg, milk, oil, and vanilla. Stir just until the mixture is moistened and there are no lumps, then gently stir in the fruit mixing lightly, then the cream cheese. Use an ice cream scoop to divy the batter between your muffin cups making the additions as even as possible, and bake for 15-18 minutes, JUST until the tops are a light golden color. Let cool in the pan for 3 minutes, then carefully invert onto a cooling rack. Serve warm with either a pat of butter, cream cheese, or jam.
Meat and Potatoes Addition Options/Variations:
* add a pinch of lemon or orange zest
* sub chopped fresh mango for the strawberries, or a combination
* add 3/4 cup chopped pecans or walnuts
Labels:
Alisa's All Stars,
breakfast,
muffins,
sweets
Wednesday, February 24, 2010
Hibiscus and Ginger Tea for a Midweek Mocktail
2 quarts boiling water
2 bags 'lemon zinger' green tea
3 bags 'passion' (hibiscus and other wild flower blend) tea
1/4 teaspoon ground ginger
3 slices candied ginger
1/4 cup honey
Plenty of ice
lemon slices for garnish
Place the tea bags and, candied ginger, and dried ginger to a large heatproof serving pitcher. Add in the boiling water and let soak for 10 minutes or until the tea is to the strength you like and discard the bags. Slowly stir in the honey so that it dissolves and let sit another 20 minutes to cool slightly. Add in plenty of ice to cool it down and put in the fridge for several hours to get nice and cold.
Stir again before serving and serve over ice with a wedge of lemon.
* For a cocktail, add a jigger of vodka to the tea in a large glass and top with either Prosecco, Champagne, or even sparkling water.
Labels:
Alisa's All Stars,
drinks
Monday, February 22, 2010
Refrigerator Pizza (Roasted Red Pepper, Arugula, Feta, and whatever else you have on hand)
I don't need to insult your intelligence with a recipe here. It is what the title implies. If you work the hours I do, do yourself a favor and keep a good brand of prepared (precooked) pizza dough in your fridge as well as some reliable cheeses and toppings. I always have roasted red bell peppers, olives, feta, goat cheese, and parmesan in mine so that even in the most dire circumstances, I can eat well. Ideally I'll have a good lettuce or herb on hand too but they can't be relied upon to stay fresh after a string of late nights like jarred veggies can.
There is no cooking necessary here - just mindless assembly line prepping (all I can manage when work takes its toll.) Preheat the oven to 375. Scatter some roasted veggies, cheese, and any leftover meat you might have (I was lucky with this particular pizza, having the leftover filet mignon on hand from Valentine's Day) over the prepared crust, bake for 15 minutes or just until the cheese is becoming golden, remove and drizzle with a light flourish of olive oil. Scatter over some sea salt and fresh cracked pepper. If you have any greens on hand, such as basil or arugula, they'd make a nice final addition.
Cut into wedges if you can muster the energy, and by all means, open a bottle of wine to go with it.
Labels:
all in one meal,
pizza
Friday, February 19, 2010
Southwestern Filet Mignon over Coriander Futuccini Alfredo
As promised - my Valentine's Day dinner - a little late...
This meal is a knockout. Filet Mignon is a treat and what I was going for on Valentine's Day but this marinade would probably be even better with a skirt or flank steak.
These two dishes - the steak and pasta - are wonderfully compatible in that they cook at the same time. Just have the pasta water boiling and ready, then wait to add the pasta to it when you put the steaks in the oven. Even if the steaks need longer than the time the pasta takes to cook, you can drain the pasta once al dente, saving a little pasta water to revive it later, and return it to the same pot mixing in the butter and parmesan to melt. Put the lid on while you wait for the steak and all will be forgiven.
I had never eaten steak over pasta before, finding the idea up until now somewhat disloyal both to steakhouses and Italians, but this is a perfect example of why rules are made to be broken.
One last nerdy tidbit - did you know that coriander and cilantro are the same thing? I'd like to say I had always known this, but truth be told, I only learned this about five years ago. Cilantro are actually the leaves of the coriander plant while 'coriander' is what the seeds or fruit are referred to as in the spice aisle (either as whole seeds or ground.)
The funny thing is that when I was little, I used to get so mad when my mom would put cilantro in her guacamole or salsa (my older siblings loved it!) Well who could blame them? Looking back I can't imagine having any emotions towards this hypnotic herb besides love and affection. See why I included it on Valentine's Day? You can keep your caviar and lobster, thank you.
Southwestern Steak Marinade Recipe and Instructions:
2 nice sized Filet Mignon OR a 1 1/2 pounds flank or skirt steak or steak of your preference
Marinade:
2 obese garlic cloves, chopped, or 4 small
2 tablespoon chipotle puree
large handful of cilantro - stalks and all - chopped
2 tablespoon olive oil
3/4 teaspoon kosher or sea salt
1/2 teaspoon minced fresh rosemary
zest of 1 small lime
1 tablespoon lime juice
1/4 teaspoon rosemary
3 tablespoons orange juice
fresh cracked pepper
2 tablespoons minced shallots
Mix the marinade together. Place fillets inside a large ziploc. Pour the marinade over and smush around to make sure all sides are coated. Refrigerate at least 8 hours, removing at least a half hour before cooking.
To cook, heat your oven to 375. Grease a stovetop grill and place it over medium heat, letting heat up for a few minutes or until it feels hot when you hold your hand within a couple inches from it. Remove the steaks from the marinade, scraping off any big bits of garlic/cilantro/shallot/etc. Season both sides WELL with kosher or sea salt and fresh cracked pepper. Add the steaks to the grill, cooking about 3 minutes per side or just until you get really nice marks and the steak pulls away easily from the grill with tongs.
Transfer to a small, greased baking sheet and place in the oven for 10-12 minutes, until cooked medium. If your steaks are particularly large, you may need to keep them in for 15-18 minutes to reach medium. And of course - if they're small, try putting them in for less to begin - you can always return them to the oven but once they're cooked - they're cooked.
Remove the steaks and cover loosely with foil for 10 minutes to let the juices redistribute. Slice on the bias and serve in a fan over your pasta. Garnish with additional fresh cilantro and the spiced pine nuts, recipe below.
Coriander Futuccini Alfredo with Spiced Pine Nuts
Ingredients:
1/2 pound fettucini or linguini
1/4 teaspoon ground coriander, or up to 1/2 teaspoon if you really want that punch
good grating fresh cracked pepper - at least 1/3 teaspoon
3 tablespoons unsalted butter
3/4 cup grated Parmesan
pinch salt
splash pasta water
handful freshly chopped cilantro
Instructions:
Heat a medium lidded pot of water over high heat. Let reach a boil - it will bubble away until you're ready to add the pasta. Once ready, add a small handful of kosher or sea salt. Let return to a boil then add the pasta, cooking for just 7 minutes or until al dente. Syphon off 1/3 cup of pasta water for later, then drain the pasta in a colander. Return the pasta to the pot and immediately stir in the coriander , pepper, butter, and Parmesan. If serving right away, add in a small bit of salt, a splash of the reserved pasta water and fresh cilantro. If not serving right away, cover with the lid and hold off adding these last ingredients until just before serving.
Spiced Pine Nuts:
2 tablespoons pine nuts, toasted at 350 for 5 minutes or JUST until golden brown. As soon as removed from the oven, toss with 1/4 a teaspoon olive oil, tiny pinch salt, 1/4 teaspoon paprika, 1/8 teaspoon cayenne, and 1/8 teaspoon coriander. Set aside until you're ready for them.
Labels:
Alisa's All Stars,
beef,
date night,
Pasta,
steak
Wednesday, February 17, 2010
Warm Portobello Salad with Arugula, Goat Cheese, and Pine Nuts
I love telling myself I'm going to have salad for dinner. It seems so perfect and healing in those moments after a heavy lunch or after sitting at your desk for hours having missed yet another workout. But then I get home and realize I don't have the ingredients to make the dressing - or more truthfully- the idea of a salad at dinnertime just doesn't hold the wonderment it did earlier.
That is until the other night. I needed that redemption of a vegetarian supper but didn't want to sacrifice comfort with a cold boring salad. In my fridge I had portobellos, apples, and a few other staples. I set to work, not even knowing what I was creating, and lucked into a salad that even I (the hypocrite) would eat for dinner, gladly, any night.
Warm Portabello Salad with Arugula, Goat Cheese, and Pine Nuts
* Serves 2 as dinner or 4 as a starter/salad course.
Place 1 tablespoon olive oil and 1 tablespoon butter in a large rimmed nonstick pan over low/medium heat.
As soon as the butter melts, add in:
3 portabello mushroom caps, lightly cleaned with a damp towel and cut into 1 inch chunks
good pinch of kosher or sea salt
good grating fresh cracked pepper
Let the mushrooms saute for 3 minutes, stirring occasionally, then add in:
1 apple, cored, quartered and cut into 1 inch chunks
additional small pinch salt and pepper
Cook stirring occasionally for 3-5 minutes, until the mushrooms have wilted and shrunken and darkened all over. Then stir in:
a grating of nutmeg
3/4 cup dry white wine or vermouth
Put the burner on high heat and bring the mixture to a boil, stirring occasionally, until nearly all of the liquid has evaporated. Remove from the heat, and add in:
the juice of half a lemon
1 teaspoon honey
1 tablespoon olive oil
1/4 teaspoon dried thyme (or more) rubbing it between your fingers to release its aroma
Mix thoroughly and set aside while you prep your lettuce. In a large serving bowl toss together:
5-6 oz package arugula
good grating fresh cracked pepper
small pinch kosher or sea salt
2-3 tablespoons toasted pine nuts
Add in the mushroom and apple mixture scraping out all the juices and dressing, toss again, then crumple in:
2 oz goat cheese
Toss again lightly and serve.
Labels:
Alisa's All Stars,
all in one meal,
salad,
vegetables,
vegetarian
Tuesday, February 16, 2010
Talking Turmeric. And proof that there's no wrong way to roast a chicken.
Turmeric. Every used it? Ever heard of it? I had vague memories of this spice, having seen it over the years in old cookbooks from the nineteen sixties and earlier. I'd never used it though until a bottle of this electrifying yellow stuff called to me from a shelf at Whole Foods. I mean with that color, how could I not buy it? I'm very scientific you see, in choosing my ingredients.
A wiki search gave me a brief rundown. Turmeric is actually part of the ginger family and is also known as Indian saffron, as it rivals saffron's distinct twang but is considerably less expensive. But most interesting of all (to me) is that turmeric is what makes mustard yellow, as well as countless other things from fabric to yellow cakes. You see it stains like the devil, so you have to be careful when handling it if you're vein about the way your fingers look. I'm only vein in theory but not in practice seeing that I'm too lazy to wear plastic gloves, even when peeling beets. I actually like it when people stare at my purple/reddish stained hands on the subway - keeps them on their toes.
Anyway, turmeric stirred the chemist in me, and by the time I got home I'd already devised a spice rub to put on the giant chicken breast I'd secured from my Whole Foods battle (grocery shopping in New York is not shopping - make no mistake - it's battle.) As I worked the insanely psychadelic looking rub into the chicken skin, I remembered to my horror that my roasting pan and rack had been murdered by the turkey at Thanksgiving (don't ask - it's a miracle it hadn't happened earlier given how cheap it was.)
I immediately set to work on how I would keep my breast halves aerated while baking to ensure crispy skin and even cooking. I could use a baking rack, but that seemed too obvious. No - the slut yellow of the turmeric was telling me to try something new. And so I did. I cut a lemon into thick wedges, placing them at odds and ends to form a bed for the breasts, tucked a sprig of rosemary underneath them, and off we went.
I have to say - I love rosemary more than I can say over the interweb. BUT - I always find that when I put fresh rosemary on a bird for roasting, it ends up burning to blackened bits by the end and all I end up tasting is char. Well, I've solved that with this recipe. The sprig infuses the bird from underneath while it roasts while a fresh layer of gremolata (a fancy Italian word for an herb medley) sprinkled over the chicken at the end, wakes everything up and makes you think, contentedly, with each bite - rosemary...
Turmeric Spiced Chicken on a Lemon Rosemary Bed:
Ingredients:
1 chicken breast, bone in and skin on, split lengthwise
salt and pepper
1 large lemon (have another on hand just in case), cut lengthwise on the diagonal to create wedges (should yield 3 wedges per breast half to lay on)
2 sprigs rosemary, plus additional to mince for the gremolata, recipe below
Alisa's Turmeric Rub:
Combine the following thoroughly. Keep in an air tight container for up to two months if not using right away.
1/4 teaspoon cayenne pepper
3/4 teaspoon turmeric
2 teaspoons Hungarian paprika
1/2 teaspoon mustard
1/8 teaspoon garlic powder
Gremolata:
Combine the following:
zest of 1 lemon
1/2 teaspoon minced fresh rosemary
dash of olive oil to bind
Instructions:
Sprinkle the chicken breast halves liberally on all sides with Alisa's tumeric rub, rubbing in well with your fingers (use plastic gloves to avoid stainage if that bothers you;) Cover with plastic wrap or put in plastic bags and place in the fridge for a minimum of 2 hours or up to 8. This isn't mandatory - if you don't have the time it's okay. BUT it will be better with a little spa time with the spices.
Remove from the fridge at least 30 minutes before roasting and preheat the over to 425. Make the beds for the breasts on a rimmed, aluminum lined and Pam sprayed baking sheet by laying the lemon slices together in opposition to allow for maximum air flow underneath the breasts. Top with a sprig of rosemary, then lay the chicken halves over the beds, smushing lightly and adjusting as necessary so that they lay flat and don't slide off.
Drizzle the tops with oil, salt liberally and put in the oven for 15 minutes. Reduce the heat to 375 and cook for another 20-30 minutes, or just until the skin is nice and deep golden and crisped and the chicken is cooked all the way through.* While it roasts - whip up the gremolata, sprinkling it over as soon as the chicken comes out. Let the meat rest for 10 minutes before serving.
*As long as you've taken the chicken out of the fridge well beforehand, the skin shouldn't lie to you - a deep, golden nice and rendered looking skin should mean a cooked bird provided you have the further evidence of caramelized juices gathered on the pan (which can actually look burnt - see above pic.) The only exception is if your oven's way off - God love you. I've experienced that before:(
Labels:
Alisa's All Stars,
Chicken
Sunday, February 14, 2010
Date Night Appetizer - Coconut Crusted Shrimp with Pink Pepper Honey
I have a love/hate relationship with appetizers. The IDEA of them - the endless possibilities, the whole 'canapes with cocktails' at 6 concept, is irressistable to me. But the reality of them - having to whip something together before whipping up the main course leaves me cold. I mess up my kitchen before I've even started the real cooking. I panic about how to time everything out. And I look nothing like one of those fifties housewives, happily doling out blinis with caviar. In fact, I look more like a grizzly bear.
And then I discovered something that reignited my passion. I learned that I can make them ahead of time. Not the cooking of course, just the prepping so that I can stash them in the fridge until go time. I am constantly shocked at how well this works - case in point - even this shrimp recipe. You can rinse, dry, and coat them in the morning, cover tightly with plastic wrap and put in the fridge right on their baking sheet. All you do before baking is drizzle them with oil and sprinkle with salt. And I don't even have to set down my cocktail to do that.
Finally, the pink pepper honey sauce is a nice change from the apricot or honey mustard type sauces usually served with this. I made it after having a cheese plate at Mario Batali's Otto that includes honey and fresh cracked pepper. SO good. But of course you can use whatever sauce you like.
Coconut Crusted Shrimp with Pink Pepper Honey
* I apologize for the terrible picture. These are much prettier in person and the sauce has a deep, hypnotic reddish pink, not the house of horrors bayou mud color above.
Ingredients:
10 peeled and devained shrimp, tails on
1/3 cup all purpose flour
2 eggs beaten combined with small splash milk
1 cup panko crumbs combined with 1/2 cup (more if you want) shredded raw coconut
2 tablespoons canola or vegetable oil, for drizzling shrimp
3/4 teaspoon kosher salt or sea salt, for sprinkling shrimp
Instructions:
If making right away, put your oven on 375.
Cover a large rimmed baking sheet with aluminum foil. Place a baking rack (cooling rack for cookies) over the baking sheet and spray liberally with nonstick spray. Set aside.
Rinse your shrimp under cold water and thoroughly pat dry with paper towels. Prepare your breading stations - your flour in a flat wide dish, your eggs and milk whisked together and ready in one bowl and your panko/coconut mixture in another.
Begin breading. One by one, lightly dredge the shrimp in the flour lightly coating all sides. Give a little shake to remove excess, then dip coating all sides briefly in the egg mixture. Shake lightly and move to the breading, pressing both and all sides in a couple of times to get as much to stick as possible. Place on your prepared baking sheet fitted with the sprayed rack. Repeat with the rest of the shrimp, spacing them evenly apart on the sheet. I like to pile a little extra panko/coconut on top of each shrimp on the tray afterwards, knowing the plastic wrap is going to knock some off.
If making ahead, cover the tray with a large sheet of plastic wrap lengthwise, then place two sheets of aluminum foil, overlapping them along the short sides, gently but firmly crimping around the edges of the baking sheet so the shrimp aren't exposed to air while in the fridge. Place the sheet flat on a shelf in the fridge until you're ready to bake, removing them 20 minutes beforehand so they don't go in the oven ice cold.
Preheat the oven to 375. Remove the shrimp from the fridge, uncover and discard the plastic wrap and foil, then drizzle the shrimp with the oil (do this carefully so that you cover the shrimp instead of the sheet.) Sprinkle each shrimp with salt, and
bake for 15-18 minutes, lowering the heat slightly if the coconut gets too dark too quickly, just until the tails turn bright pink and the shrimp are cooked through with not a hint of translucence to them.
Pink Pepper Honey Dipping Sauce:
1/3 cup honey
1 teaspoon pink peppercorns
1/4 teaspoon paprika
1/2 teaspoon whole black peppercorns
Crush the pink and black peppercorns in a ziploc with a mallet or heavy pan. Add the paprika in and shake to combine. Stir the mixture into the honey and cover until you're ready to serve. Just before serving, warm the honey briefly in the microwave just to make it more 'dipable.'
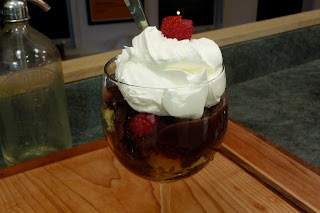
Date Night Dessert - Nigella's Chocolate Pudding Trifle with Strawberry 'Liquor'
You didn't think I was just going to give you pulled pork for Valentine's Day, did you?
Here is a simplified version of Nigella's chocolate trifle. You can use any pound cake recipe you love or even a store bought one (I have great luck with Entenmann's marble loaf.) With all of that strawberry liquor and chocolate pudding on top, you could probably use cardboard and find it delicous. It's damn magic that custard, I tell you.
Confession - I didn't even know what trifle was until I saw Nigella make it on an episode of Nigella Bites. Which is strange because trifle is also a traditional southern dessert in the US. I guess it just flew by me somehow while growing up in Texas. In fact if someone had asked me what trifle was, before seeing said episode, I'd have said, 'a disgusting English dessert containing meat."
Well, thank goodness for Nigella, once again, as this is my favorite, favorite naughty thing to dive into when the devil's on your shoulder. And I'm sorry but a good Valentine's Day may be all about love, but a great Valentine's Day involves the devil.
The shortcut I referred to earlier is to make a quick 'strawberry liquor' by mixing strawberry jam, Amaretto, and vanilla extract together and pouring it over the layered cake pieces. Nigella makes 'sandwiches' with jam and cake - I just mix and pour this over the cake layers. It's easier and adds to the 'carpe diem' factor that this treat exudes in spades. Top with whipped cream, extra berries and seize the day, or night.
Nigella's Chocolate Pudding Trifle with Strawberry 'Liquor'
Serves 3 (though technically, 6 - see note below.) Easily doubled.
* It's worth mentioning that I don't know a human being who can actually finish one serving of this - it's that rich. That said, I like serving it in glasses, so I kept the servings per glass. You can easily cover leftovers in plastic wrap and return them to the fridge until the next day, as we do. OR embrace the date night concept and share a glass between you.
Custard Ingredients and Instructions:
2 ounces bittersweet chocolate, minimum 70 percent cocoa solids, chopped
2/3 cup plus half a tablespoon milk
2/3 cup plus half a tablespoon heavy cream
4 egg yolks
1/4 cup plus half a tablespoon sugar
1/2 teaspoon vanilla extract
1/6 cup cocoa
Melt the chocolate on low to medium heat in the microwave, checking after 1 minute, though it will probably need a little more. Or you can place it in a bowl over a pan of simmering water. Once the chocolate is melted, set it aside while you start the custard.
In a saucepan warm the milk and cream over low heat, being careful to not let it form a skin (stirring prevents this.) Whisk the egg yolks, sugar, extract, and cocoa in a large bowl. Pour the warm milk and cream into the bowl in three batches, swiftly whisking it into the yolks and sugar mixture to prevent the eggs from curdling. Stir in the melted chocolate, scraping the sides well with a rubber spatula to get all of it in, and pour the custard back into the rinsed saucepan. Cook over a medium heat until the custard thickens, stirring all the time. Make sure it doesn't boil, as it will split and curdle. Keep a sink full of cold water so that if you get scared you can plunge the bottom of the custard pan into the cold water and whisk like mad, which will avert possible crisis. Once thickened (your spoon should leave a wake in its path), set aside and let cool for 15 minutes (stirring a time or two to keep it from developing a skin.) Meanwhile, get on with assembling your trifles - ingredients/further instructions below.
Cake:
2 1/2 inch slices of pound cake, either vanilla, chocolate, or marbled, cut into quarters
Strawberry Liquor:
3 tablespoons strawberry jam (seedless)
2 tablespoons Amaretto (almond liquor)
1/4 teaspoon vanilla extract
Garnishes/Essentials:
couple handfuls fresh raspberries, plus extra for garnish
Fresh whipped cream or cool whip, for topping
3 wine glasses, goblets, or martini glasses for serving
Divide the cake pieces between your 3 serving glasses, overlapping them slightly. Carefully stick your raspberries down around the sides of the glasses so they look pretty - either between the cake and glass or wherever they fit but so that you can see them. Make the strawberry liquor by stirring together the jam, amaretto, and vanilla combining well. Divide that up between the glasses, pouring over the cake and letting some drip down the sides to the bottom. Repeat with the slightly cooled chocolate custard. Cover with plastic wrap and refrigerate at least 4 hours and up to overnight before serving.
Just before serving, garnish with either fresh whipped cream or cool whip, extra raspberries and mint leaves if you have any.
Labels:
date night,
nigella,
sweets
Piggy Back Pulled Pork Sandwiches with Sharp Cheddar Frico
Happy Valentine's Day! I realize this isn't exactly a date night main entree, but as you can see I'm a week behind in my posting to cooking ratio. No matter - this recipe is my Valentine's present to YOU. Have you ever made pulled pork sandwiches? I hadn't and for the Super Bowl, I searched high and low for the perfect recipe with a particular version in mind I'd had years ago made by a friend in her crock pot. When pushed for what she put in it, she said "a can of Coke and an onion." Hmm...some people sure are protective of their recipes. I didn't doubt that those two things were in there, but she was leaving out the rest of the goods. I filed the idea of pulled pork via crock pot and Coke away until last Sunday when the obsession for the perfect recipe returned in full force.
As usual, I didn't use any recipe I found, but went rogue like a gypsy mixing potions. Lots of recipes call for brown sugar in addition to soda or juice or other sweet liquid but it struck me as a fun challenge to think of other things to contribute sweetness and flavor (I don't get out much.)
One thing came to me right away - pickle relish. My grandmother used it in her tuna fish and I had fond memories of its sweet but sharp bite amongst savory ingredients, so in it went. Even if you're not a fan, I don't think it will put you off as it's not an in your face guest at the party but rather a sit-quietly-in-the-corner-scoping-out-the-ladies type.
The thing to remember about long slow cooking - be it via crock pot or stove top simmering (ragu/short ribs/etc.) is even though it's a wonderful way to slowly develop incredible flavor, you have to remember to give it a good slap in the face after all that relaxing to wake up the flavors. I know this seems counter intuitive but trust me on this one.
This is why I hold off my final arsenal of flavors until the very end. Molasses, tomato paste, and more relish and spices, cracked black pepper being the most important. I mean with all that sweetness going on, someone's got to be the grown up and look responsible. This is also where the pig on pig action comes into play. You know I'm a texture freak, which is why I love putting crisp cooked bacon slices on top of the sandwiches instead of adding snipped bacon in with the tenderloin at the beginning. But if you don't like the idea of bacon on top of pulled pork, you can cut the crisped bacon into 1/2 inch pieces instead, tossing them in with the shredded meat at the last minute before serving if you like. And if you're already breaking the rules, I advise tipping in any bacon grease from the pan and stirring it in. It may sound wrong, but it's so right, like two old friends reuniting after a long time apart.
The cheddar fricos were an unfortunate accidental discovery on my part. I was literally about to scold my husband on his inability to eat anything without cheese on top of it, mid bite of pulled pork sandwich, when I noticed a little slightly burnt spot of cheese on my pan of stuffed jalapenos. You can guess what happened next. And please do - I'm too embarrassed to say it out loud. Anyway, if you want to dive head on into gluttony as I have, make the cheddar fricos to go on top.
PS - we saw Wolfman yesterday. If you haven't seen it yet, don't bother. Just have a martini and put in the Jack Nicholsen/Michelle Pfeiffer movie Wolf from the nineties. It will seem like 'Best Picture' in comparison if not at least entertain you which is more than I can say for the sadly misguided Wolfman:(
Piggy Back Pulled Pork Sandwiches with Sharp Cheddar Frico
* This recipe should make at least 16-18 sandwiches.
* The pulled pork would also be excellent on nachos.
* Cheese Frico is not pictured because it was a last minute discovery.
Ingredients:
2 pounds of pork tenderloin (you can just get 2 one pound tenders)
1/2 cup Dr Pepper
2 tablespoons pickle relish
3 tablespoons orange juice
1 teaspoon Worcestershire sauce
1 teaspoons paprika
1/4 teaspoon pepper
1/4 teaspoon cayenne
1/8 teaspoon ground cloves
2 tablespoons ketchup
2 tablespoons chopped shallot
1 teaspoon minced fresh garlic
1 teaspoon kosher salt
3 heaping tablespoons molasses
2 heaping tablespoons double concentrated tomato paste
1/2 teaspoon pepper
1/4 teaspoon paprika
1 teaspoon sweet pickled relish
8+ slices bacon, baked in a 350 oven for 15 minutes until crisp (if you're serving the all of the pulled pork, double the bacon called for so that you'll have extra slices for topping just in case. BUT if you're adding the bacon into the pulled pork versus putting it on top, you only need about 5 cooked snipped pieces and their grease. Anymore might dominate the other flavors.)
16-18 Hamburger buns
Cheddar Frico, recipe below
Instructions:
Place the tenderloins in a cold crock pot. Meanwhile, mix up the first set of ingredients - the Dr. Pepper through the teaspoon of salt in a medium bowl. Pour it into the crock pot over the tenderloins, and lift and mix them around to make sure they're all touched by its magic. Put the lid on and put the crock pot on the 'high' setting for 1 hour.
After one hour, lower the crock pot to the 'low' setting and cook for 6 hours, flipping the tenderloins over at some point, preferably midway through. After six hours, use a fork to check and see if the meat shreds easily when scraped with a fork. If it does, turn off the crock pot and let cool for a few minutes, then transfer the meat to a medium lidded pot and shred mercilessly, using two forks. (If it's not shred-able yet, keep cooking another 30 minutes to an hour until it is.)
Once shredded thoroughly, stir in the last set of ingredients - the molasses through the relish, blending well, and put over low heat on the stove. Simmer with the lid on or partially on, for 25 minutes, stirring occasionally. (During this time you can prepare the bacon and cheese frico to go on top.) Do a final taste for seasonings, adjusting any salt/pepper if necessary to taste.
Serve on the softest buns you can find, preferably those melt in your mouth potato rolls, stirring the meat well beforehand to evenly distribute the juices. Top with crispy bacon then frico, and serve.
Cheddar Fricos
* This isn't so much a recipe as a guide. All frico are is mounds of cheese baked or fried until they form flattened little crisps. I like to bake mine for ease, but it helps to have parchment paper or a silpat to keep them from sticking.
* 3 cups of cheese should yield 12 fricos, but this isn't a science - the size are up to you so you may need to adjust the amount of cheese called for if you're serving it on all the pork sandwiches.
Ingredients:
3 cups of shredded sharp cheddar
a silpat or parchment paper
a baking sheet
Instructions:
Preheat oven to 400. Place the shredded cheese in little mounds (anywhere from a heaping tablespoon to whatever you like, just be aware of adjusting cooking time if you make them bigger) on a silpat or parchment lined baking sheet. Make sure you space the little mounds at least an inch apart as they spread out like a cookie when baking.
Bake for 5-7 minutes, just until melted and flattened out and the edges become golden brown. Remove and let cool for 2 minutes before transferring with a spatula to your sandwiches. If you want them even crispier, transfer to a baking rack to cool.
Labels:
Alisa's All Stars,
bacon,
Pork,
sandwich,
slow supper sundays
Thursday, February 11, 2010
Homemade Pimiento Cheese, for Stuffing or Slathering
Do you ever find that when you're making party food, you end up with 99% bready snacks? Crostini, chips and dip, little pizzettes, cheese straws, etc? Not that I have a problem with carbs (clearly) but I don't like filling my guests up with loads of starches. They get full and then they don't drink as much and then we have nothing to talk about the next day. No thank you - I prefer my guests on the loose side of the goose.
Speaking of imbibing, over the holidays I made this incredibly wonderful homemade pimiento cheese from the Down Home with the Neely's cookbook. I hadn't encountered pimiento cheese, in any form, since I was little and was intrigued by making it from scratch. I threw a batch together, spread it on long slabs of sliced French bread, and baked them until bubbled and brown, crumpling cooked bacon over the top. As you can imagine, they were gone before I had time to unzip my camera case.
I wanted to make them again for the Superbowl but because we were also having pulled pork sandwiches, I didn't want to serve the pimiento cheese on bread. So I did what any other self respecting Texan would do and stuffed jalapenos with it instead. They were fantastic, if not a little on the ugly side as the cheese tends to crawl out of the peppers if you over stuff them (not a problem other than aesthetically as long as you grease your pan well.) If you want pretty stuffed peppers, go the old school route stuffing them with a long, narrow wedge of hard aged cheese, wrap them in bacon, secure them with a toothpick and bake.
But honestly, after trying these, I'll be hard pressed not to do the pimiento version every time. I know I sound like a newly converted Mormon or something, but this cheese is the cat's pajamas. Even Kris will grab this straight from the fridge, spread it on a piece of bread and eat it cold. I realize this isn't exactly James Bond daredevil behavior but you have to understand this is a man who hasn't eaten a ham and cheese sandwich other than in piping hot Croque Monsieur form since he was ten. To him, cheese just isn't cheese unless it's bubbling and burnt in places. But enough about him.
What I want to know is how you feel about the Neely's show on Food Network. I happen to love it (though I admit to decreasing the volume by 50% when it's on.) What charms me to pieces is their untamed, unedited love for cooking, and for each other. So many of Food Network's shows are so damned glossy and smiley and staged these days, I find the Neely's a welcome dose of genuine imperfection. And if any of their other recipes are as good as this damn cheese, you can't afford not to pay attention to them.
Homemade Pimiento Cheese
* Adapted slightly from the Neely's
* If you can't find pimiento peppers, simply use half a 7 oz jar of roasted red peppers - just drain them and chop them fine.
Ingredients:
1 1/4 cups sharp white cheddar cheese
1 1/4 cups sharp regular (orange) cheddar cheese
3.5 oz pimientos from a jar, drained and chopped fine (usually just half of a 7 oz jar)
1/4 cup plus 2 tablespoons mayo (I have used light mayo and it works great)
1/4 teaspoon black pepper
half of a small garlic clove, finely minced or grated
1/4 teaspoon cayenne pepper
1/2 teaspoon mustard powder
Instructions:
Combine all ingredients in a medium bowl with a fork, very well. You can also blend them in a small chop prep blender if you like a smoother, more traditional pimiento cheese consistency, though it won't make an ounce of difference taste wise. Cover and chill for at least two hours before serving, or chill for up to 4 days.
Serving suggestions - spread over sliced 1/2" rounds of French bread and bake at 375 for 15-18 minutes until golden brown in places. Top with cooked crumpled bacon. Or serve cold between slices of bread as sandwiches. Also great as a dip with chips or on prepared pizza dough, baked for 15 minutes at 400. Or of course stuffed in peppers as in the below recipe.
Pimiento Cheese Stuffed Peppers:
* The above pimiento cheese recipe will easily accommodate 13 whole peppers, or 26 halves for stuffing.
Preheat the oven to 375.
Add 13 whole jalapenoes to a pot of water. Bring the water to a boil over high heat, and boil for about 4 minutes or just right before they turn from that beautiful bright green to a God awful poo green. Transfer the jalapenoes to an ice bath to shock them for several minutes. Remove them from the bath and pat dry with paper towels.
Once dry, cut the jalapenoes in half, length-wise, removing the seeds and veins with a spoon. Pat the insides dry, then begin stuffing with the pimiento cheese. Remember not to pile it too high or it will just all ooze out anyway.
Place the stuffed jalapeno halves onto a greased rimmed baking sheet. Bake for 15-18 minutes until golden brown on top. Cool slightly before serving.
Sunday, February 7, 2010
Curiously Addictive Roasted Garbanzo Beans
I made these last night to snack on during the Superbowl. When I pulled them from the oven, Kris reached for one, tasted it, then said, "Well, at least we can say we tried them..."
I sadly agreed. They were okay but nothing special. I sprinkled them with a little extra salt and put them in a dish anyway since they were already made. The game started and I reached for a handful. Then Kris reached for a handful. Then I reached for another handful. Then he reached for another handful... Before I knew it they were gone.
I don't know what happened but they seemed to get better the more we ate them. Or maybe they just needed that little bit of salt after roasting to make the flavors pop. Either way, I'm so glad I didn't just throw them out. These will be a new football, movie night, or anytime snack at our house.
Have you ever been unimpressed with something you made then suddenly fallen in love with it?
Roasted Garbanzo Beans
Ingredients:
* Garbanzo beans are also known as chickpeas, or 'ceci' beans in Italian.
* Yours should look a little darker and more shrunken than mine pictured - I didn't leave this batch in quite long enough.
1 14 oz can of garbanzo beans, drained, rinsed thoroughly then patted dry with paper towels
3/4 teaspoon kosher or sea salt
1/4 teaspoon fennel seeds (you can reduce this if you don't want them this pronounced in the mix)
1/8 teaspoon ground cinnamon
1/8 teaspoon coriander
1/8 teaspoon garlic powder
1/2 teaspoon cumin
2 teaspoons olive oil
another 1/4 teaspoon kosher salt to sprinkle over as soon as they're pulled from the oven
Instructions:
Preheat oven to 400.
Place the beans on a large, rimmed cookie sheet. Dust them with the salt, fennel, and spices, tossing with a spatula (fingers are even better.) Drizzle with the olive oil and toss again to make sure they're all coated.
Roast for 15 minutes then give the pan a good shake and continue roasting another 12-15 minutes, until the beans are dark brown in places, have shrunk a bit, and have a nice crispy texture.
Remove, toss with additional salt while hot, and serve.
Saturday, February 6, 2010
Sinless Pasta with Artichokes, Asparagus, and Black Olives
Every now and then, I stumble on an ingredient that makes me believe that if push came to shove, I could survive as a vegetarian. I know mushrooms are the poster child for this (as the closest vegetable to meat in spirit) but for me it's the artichoke. Talk about meaty and intense and lusty, I feel sinful even thinking about them.
And while I love the idea of preparing fresh artichokes - buying them from the farmer's market, trimming them, then cooking them low and slow with all sorts of goodies stuffed between the leaves like Pancetta and cheese - I don't ever see myself actually doing this. I'm too lazy. Besides, a home cook has to leave some things up to restaurants. Otherwise we'd never leave the kitchen.
If for some reason you have any prejudices against this beloved, hideous vegetable, I urge you to buy the hearts marinated in seasoned olive oil. All the peeling and cooking and seasoning and stressing has already been done for you leaving behind just the meaty, luscious hearts soaking in the aromatic oil. Naughty.
I like to keep the leftover oil in my fridge (after I've used up the hearts) to drizzle over toasted crostini for appetizers with a little parmesan cheese. But that my dear, is another post.
Sinless Pasta with Artichokes, Asparagus, and Black Olives
Ingredients:
12 oz quartered artichokes hearts (from 12 oz jar that have been marinate in oil) drained (I am partial to Haddon House brand)
Sliced black olives, from a 2.2 oz jar, drained
1/2 cup parmesan
1/4 teaspoon red pepper flakes
16 oz fresh short pasta, such as spirals or rigatoni
handful kosher or sea salt
1 bunch asparagus, woody stems removed and cut inti 1 inch pieces
3 tablespoons olive oil from the jar of artichokes
2.5 oz goat cheese
4 chives, snipped/minced fine
pinch sea salt
1/4 cup toasted pine nuts (toasted in a 325 oven for 6-8 minutes just until golden)
Instructions:
Add the quartered artichoke hearts, olives, parmesan, and red pepper flakes to a large serving bowl or pot. Toss well and set aside.
Put a large pot of water over high heat. Once boiling, add a handful of salt to it, let it return to a boil, then add the pasta and boil for three minutes (if your pasta is dried instead of fresh, cook for five.) Add the chopped asparagus to the boiling water and cook together with the pasta another 3-4 minutes, just until the pasta is al dente and the asparagus has turned a bright green.
Drain and add the pasta and asparagus to the artichoke mixture. Toss then add in the oil and goat cheese tossing again. Add in the fresh chives, salt, and pine nuts giving one last toss. Serve hot.
Labels:
Pasta,
vegetables,
vegetarian
Cheesy Cauliflower Gratin with Crunchy Breadcrumb Crust
Basil and red pepper flakes keep this gratin from being just another gratin. I love the bite the pepper flakes give the otherwise mellow cauliflower, but you can omit them if you're not a fan.
Cheesy Cauliflower Gratin with Crunchy Breadcrumb Crust
* Adapted from Ina Garten's recipe
* If you are following a low carb diet, you can substitute the breadcrumbs in the topping with chopped pine nuts or almonds. If doing so, cover the gratin with foil when you bake it, uncovering the last ten minutes to let the crust brown.
* Feel free to add more cheese to the cauliflower mixture if that's up your alley.
Ingredients:
nonstick spray
2 tablespoons seasoned Italian breadcrumbs
1 large head cauliflower, cut into florets
2 cups chicken stock plus 2 cups water, for boiling cauliflower
2 tablespoons unsalted butter
3 tablespoons all purpose flour
2 cups hot milk (at least 2% - not skim), heated in microwave until hot but not to the point of boiling
1/8 teaspoon fresh cracked black pepper OR white pepper
1/8 teaspoon fresh grated nutmeg
1/2 cup grated Parmesan
1/2 cup grated sharp cheddar
hefty pinch red pepper flakes (I like about 1/4 teaspoon)
10 basil leaves, torn
1/2 teaspoon kosher or sea salt (if you used low sodium stock to boil cauliflower, up this to 3/4 teaspoon)
Topping:
1/4 cup Italian seasoned breadcrumbs (omit if following a low carb diet, maybe subbing with chopped almonds or pine nuts)
1/4 cup Parmesan
2 tablespoons butter, melted
Instructions:
Preheat oven to 375. Grease an 8x8" casserole dish with nonstick spray then sprinkle the 2 tablespoons of Italian breadcrumbs around the bottom and sides. Set aside.
Pour the chicken stock and water into a medium pot with a lid. Cover and bring to a boil over high heat. Carefully add the florets, boiling for 6-8 minutes, just until the florets pierce easily with a fork but before they begin falling apart on you. Drain.
While they're draining, melt 2 tablespoons of butter in a medium saucepan over low heat. Whisk in the flour, 1/2 a tablespoon at a time, whisking constantly with each addition. If the mixture turns a dark shade of brown on you before you can blend all of the flour in, take the pan off the heat until it's nice and mixed in. Once well blended, carefully pour in the hot milk and raise the heat as you blend it in bringing it to a boil. Boil, whisking constantly, for 1-3 minutes, until thickened (should coat the back of a wooden spoon, not just run right off of it.)
Remove the milk mixture from the heat and whisk in the pepper, nutmeg, Parmesan, cheddar, red pepper flakes, basil leaves, and salt. Once mixed, stir in the drained cauliflower just until it's well incorporated (don't over blend or the florets will disintegrate on you.)
Pour the mixture into the prepared baking dish. Make the topping by combining the parmesan and breadcrumbs, then sprinkle the mixture evenly over the top. Drizzle the butter evenly over the crumb topping.
Bake for 25-30 minutes, until the top is golden brown. Let sit for 5 minutes to set up before serving.
Labels:
side dish,
vegetables
Friday, February 5, 2010
Fry Me to the Moon - Italy meets the Southern US in the Lightest, Brightest Fried Chicken
Confession. I've never made proper southern fried chicken before. I've set out to a thousand times, but then either lacked the time needed to marinate the chicken (a mandatory 24 hours in buttermilk) or geeked out at the last minute thinking of all those damn calories. But here's an even more shocking confession. I fry protein all the time. As in spitting hot oil and batter and yep - your dietician's worst nightmare.
The only difference is I use boneless, skinless chicken breasts or lean pork and sub olive oil for the fat component. Don't ask me why - but those two changes make me feel extremely virtuous as if I cured polio or something. I mean, olive oil's healthy, right? And well...the meat I use is both white AND the evil skin's removed, so voila! It probably doesn't even count...
Besides, my version is so bright and piquant and zesty, well there's just no way it can be bad for you. I simply refuse to believe any differently, so please - sh.
Equally comforting but perhaps not as obvious a side dish for fried chicken is this cheesy, satisfying risotto - though I think the addition of cheddar cheese and sprinkle of chives make perfect sense with this. The risotto recipe will follow in a subsequent post.
Light and Bright Lemony Fried Chicken
Step 1 - Marinate Chicken:
2 boneless, skinless chicken breasts of a nice thickness - anywhere between 1/2 and 1/3 inch (though this recipe will accommodate up to 3 large chicken breasts or 4 small)
1/4 cup fresh lemon juice
1/4 cup extra virgin olive oil
1 teaspoon Worcheshire
1/2 teaspoon hot sauce (such as Tabasco)
1 teaspoon kosher salt
1/4 teaspoon black pepper
Combine all the marinade ingredients - the lemon juice through the pepper - together well in a large sealable plastic bag. Add the chicken in, turning several times to coat well. Squeeze excess air out of the bag before sealing, then lay flat inside your refrigerator (so the chicken gets the full shock treatment of the marinade) for 2-4 hours. Any longer and you risk the acid 'cooking' the chicken breasts, making them tough.
Step 2 - Prepare Breading Stations:
A. Panko Breading Station
Combine the following in a wide, flat bowl, cover with plastic wrap and set aside.
2 1/4 cups panko
1 1/4 teaspoon kosher salt
1/2 teaspoon cayanne pepper
1/2 teaspoon dried English mustard
1/4 teaspoon chili powder
1/4 teaspoon paprika
1/8 teaspoon black pepper
B. Buttermilk Station
Add 1 cup Buttermilk (can sub regular milk and whisk in 2 eggs) to a wide, flat bowl or pie plate, cover with plastic wrap, and chill until ready to use, whisking again right beforehand.
C. Flour Station
Cover a small baking sheet in aluminum foil (to help with cleanup.) Pour over 1 cup flour, scattering it well. Set aside (if it's going to be awhile, you can cover it with another sheet of aluminum to keep dust, etc. out of it.)
Step 3 - Breading:
Preheat oven to 325.
Remove the chicken from the marinade, shaking off excess then patting dry with paper towels.
Dredge them lightly through your flour to coat both sides, then gently dunk in the buttermilk, turning quickly to coat both sides. Shake off excess buttermilk, then press into your panko mixture, being sure to coat every bit thoroughly on both sides and including the edges. I like to do both sides a couple of times.
Place the breaded chicken on a clean plate or piece of aluminum foil while you heat up your oil.
Step 4 - Frying/Crisping in Oven:
Add 1/2 cup olive oil (doesn't need to be extra virgin) OR just the amount it takes to create a depth of 1/2 inch to a large, rimmed skillet. Bring over medium heat for a couple of minutes until hot but not smoking. You can test the oil by adding a tiny pinch of panko crumbs to it. If it bubbles and spits, it's ready (if it instantly turns deep brown, lower the heat slightly.) If nothing happens, wait another 30 seconds or so then repeat the test.
Carefully add the chicken to the oil, spacing well apart in the pan. The oil should only come up half way to the edge of the chicken breasts, not drown/cover them. Fry for about 2-3 minutes per side, just until golden brown. Remove to a baking sheet fitted with a baking rack and transfer to the oven for 8 minutes. (If you just put them on a flat surface, they will become soggy.) This will allow them to crisp up even further. Remove, quickly patting with paper towels to remove excess grease before serving. Scatter with chopped fresh chives.
Labels:
Alisa's All Stars,
Chicken
Wednesday, February 3, 2010
What I feed my imaginary children - Beef Rigatoni in an Intensely Tomato-y Cream Sauce
I make it on Sunday afternoon, sipping a nice Ripasso as I chop, simmer, and stir.
Dalton, my youngest and the only child to ever win the USCF Chess Championship, runs up to the stove dipping a spoon into the sauce. "Delicious, Mom," he says. "Lidia Bastianich has nothing on you." He then returns to his room to finish his side project for Nasa (he's in first grade and I don't like him doing freelance work during the school week...)
Kidding! I don't have kids, much less well behaved child prodigies (unless you count my cats, which would be crazy. And I'm not crazy. Usually.) But if I did have kids, this is the kind of pasta I would feed them. A big old piping hot batch of it served family style.
This is seriously comforting, homey food. Sunday food. Fireplace food. And while a nutritionist probably wouldn't endorse it, I like the fact that just a teensy bit of cream cheese gives it that lovely pink hue and creamy texture. I mean, between the organic tomato paste and the lack of heavy cream, it's practically health food...
A couple of sticklery things - you don't want your rigatoni cooked a second longer than al dente. Any further and you risk them collapsing on you, defeating the whole reason you hired them for the job in the first place. God knows they're not attractive, bless them. But the fact is no other pasta can envelop a hearty meat sauce like rigatoni. They make every bite a treasure hunt.
Beef Rigatoni in an Intensely Tomato-y Cream Sauce
* Serves 4 pigs or 6 regular eaters.
Ingredients:
1 tablespoon olive oil
1 tablespoon butter
1 medium sweet onion, diced
1/2 teaspoon kosher salt
fresh cracked pepper
2 fat cloves garlic (or 4 small - don't skimp here), minced
1 pound ground beef (for a higher meat to pasta ratio, up it to 1 1/2 pounds, or only use 3/4 lbs of pasta)
1/8 teaspoon kosher salt
1/8 teaspoon red pepper flakes (or more if you really want that kick)
1/2 cup white wine or vermouth
4 oz canned tomato paste, preferably organic
1 (14 oz) can diced tomatoes, lightly drained
2 oz cream cheese
1/8 teaspoon kosher salt
1/2 teaspoon dried oregano
1 lb rigatoni
handful salt to flavor water
1/2 cup Parmesan cheese
Instructions:
Put a large pot (with lid on) of water on a burner over high heat for your pasta.
Meanwhile, add the butter and olive oil to a large dutch oven and put over low/medium heat. Let the butter melt, then add the onions, 1/2 teaspoon salt and some fresh cracked pepper giving a good stir. Cook for a couple of minutes, then stir in the garlic. Saute, stirring occasionally another 2-3 minutes until the onion is translucent.
Now add the ground beef to the onions and garlic, breaking the meat up gently (but not too aggressively) with your wooden spoon. Season with the additional salt and red pepper flakes then cook, stirring occasionally for about 8 minutes or just until the meat is browned. No need to cook it to death at this stage - you're about to boil the hell out of it.
Carefully pour in the wine and raise the heat to high. Once the wine is boiling, give everything a good stir then let simmer away until the majority of the liquid has evaporated and the mixture is almost dry again (about 10 minutes.) While you wait is a good time to cook your pasta, as your pasta water should be boiling by now. (If not, do the following as soon as it's ready.) Add a handful or kosher or sea salt to the water, allow it to return to a boil, then add your rigatoni, cooking ONLY to al dente - about 9 minutes.
Back to your beef/wine mixture - once the majority of the liquid has evaporated, lower the heat to low and stir in the tomato paste, diced tomatoes, cream cheese, salt, and oregano. Combine well and keep over low heat until your pasta is cooked.
Once the pasta is ready, use a spider or slotted spoon to strain the pasta from the water and add it into the sauce along with a ladle full of pasta water (about 1/3 cup.) Immediately stir in the parmesan cheese, mixing well so that it melds into the sauce. Taste for any additional seasoning necessary and serve with a tiny sprinkling of dried oregano over the top.
Labels:
Alisa's All Stars,
all in one meal,
beef,
Pasta
Tuesday, February 2, 2010
Something to consider for the Super Bowl...
Or when it's 20 degrees which seems to be every night in New York this winter.
Let me start by saying I have no problem with the classic, good 'ol American grilled cheese. But this version ever so humbly blows the socks off the original. It's actually a little embarrassing.
And while I served these with a salad for dinner, I do think they'd be perfect Super Bowl finger food cut into little triangles. You can even fry up a big batch of the sandwiches then keep them warm in a low oven until you're ready to cut and serve them. They'll just sit in the oven happy as taxidermy, all gooey on the inside and crispy on the outside until kick off.
Gooey Goat and Mozzarella Grilled Cheese with Bacon
* This filling will make 3 sandwiches, or 12 'triangles' when cut cross wise from corner to corner as an app.
* If omitting the bacon, I'd use salted butter for more flavor, but then again I'm a salt addict.
Ingredients:
6 slices of sourdough bread
Butter, to spread
2.5 oz goat cheese, room temp
1/2 cup shredded mozzarella (not fresh mozzarella, your regular bagged variety)
1 tablespoon light mayonnaise
1/8 teaspoon kosher or sea salt
6-8 drops Tabasco (hot sauce)
1/4 teaspoon prepared yellow mustard (the all American ballpark kind)
Fresh cracked pepper
3 tablespoons unsalted butter plus a dash of olive oil
6-8 slices of bacon, baked on a cookie sheet in a 400 degree oven for 15-18 minutes until crisp then patted dry and cut in half
Instructions:
Preheat the oven to 325.
Mix the goat cheese, mozzarella, mayo, salt, Tabasco, mustard, and pepper together in a small bowl, using a fork to help things along. Set aside. Meanwhile, spread 3 of the sourdough slices with butter on one side. Spread the cheese filling onto the remaining 3 slices, making sure the filling is evenly distributed across and not going over the edge. Add the bacon over the cheese spread, as much or as little as you want.
Now you can put the sandwiches together by placing the buttered slices, butter side-down on top of the cheese and bacon. Press the sandwiches gently but firmly together, pushing your palms down on them to help them stick.
Heat the 3 tablespoons butter and dash of oil in a large, rimmed, nonstick skillet. There should be enough butter, once melted and swirled around by tilting the pan, to coat the entire bottom with a thin layer. If not, add more butter until it does.
Once hot but not to the point of browning on you, add the sandwiches, spreading out evenly in the pan. These will cook quickly, so don't leave them. After about a minute, use a spatula to lift one, checking to see if your crust has become golden yet. If so, flip carefully but immediately to the other side, gently pushing the sandwiches around in the pan to soak up any leftover butter (by now some of it will have browned, adding that wonderful nutty flavor.) Cook just another 30 seconds or so until golden, then transfer to a baking rack fitted over a baking sheet and transferring to the oven to continue heating through and melting the cheese, about 8 minutes. If not serving right away, lower the heat to 200.
Remove, cut, and serve.
Subscribe to:
Posts (Atom)